johncg67
Best Short Course RC Trucks for Bashing
For fans of RC trucks, bashing is more than a hobby. It’s an adrenaline rush. Short course RC trucks are popular for their toughness and performance on rough terrains.

These trucks are built to last, with strong builds and powerful motors. Whether you’re experienced or new, knowing what makes a great RC truck for bashing can improve your fun.
This article will show you the best options out there. We’ll highlight their main features and what to look for in your next RC truck.
Key Takeaways
- Top-rated short course RC trucks for bashing
- Key features to look for in a bashing RC truck
- Tips for making your RC bashing experience better
- Why durability and performance are important
- How to pick the right RC truck for you
What Makes Short Course RC Trucks Great for Bashing
Short course RC trucks are a hit for bashing fans. They mix durability and performance perfectly. These trucks can take a beating, making them a favorite among RC fans.
Durability Features
Short course RC trucks stand out in bashing thanks to their robust construction. They use strong materials that can handle crashes and rough play. Many models come with:
- Heavy-duty chassis
- Durable plastics
- Metal parts for added strength
This makes them last long, even after many bashing sessions. Users get a reliable and durable product.
| Feature | Description | Benefit |
|---|---|---|
| Heavy-duty Chassis | Strong, reinforced frame | Enhanced durability |
| Durable Plastics | High-quality plastic materials | Resistant to damage |
| Metal Parts | Metal components for critical parts | Increased strength and reliability |
Performance Capabilities
Short course RC trucks also shine in impressive performance. They have strong motors and advanced suspension. This lets them go fast and handle tough terrain easily.
“The combination of power and agility in short course RC trucks makes them ideal for bashing.”
Their performance is boosted by:
- High-torque motors
- Advanced suspension systems
- High-speed electronics
These features offer an exciting bashing experience. Short course RC trucks are a top pick for enthusiasts.
Understanding RC Truck Bashing
RC truck bashing is an exciting hobby that mixes speed, skill, and toughness. It pushes both the driver and the truck to their limits. This makes it a fun activity for RC fans.
What Is Bashing?
Bashing means driving RC trucks on tough terrain, doing jumps, and going over obstacles. The truck needs to be strong and able to handle big hits. Short course RC trucks are perfect for this, thanks to their design.
Why Short Course Trucks Excel at Bashing
Short course trucks are great at bashing because they’re built tough and perform well. They can handle rough ground and fast speeds. They have important features like:
- Durable construction
- Powerful motors
- Advanced suspension systems
These features help short course trucks do well in bashing. Here’s a look at what makes them special:
| Feature | Benefit for Bashing |
|---|---|
| Durable Construction | Withstands impacts and rough handling |
| Powerful Motors | Provides high speed and acceleration |
| Advanced Suspension | Enhances stability and control on rough terrain |
Key Factors to Consider When Choosing the Best Short Course RC Truck
Choosing the best short course RC truck involves several important factors. It’s about understanding what makes a truck great for bashing.
Build Quality and Materials
The build quality and materials of a short course RC truck are key. High-quality materials mean the truck can handle bashing without needing repairs often.
Power Systems and Speed
The power system, including the motor and battery, affects a truck’s speed and how fast it can go. A more powerful system means faster speeds and quicker starts, making bashing more fun.
Suspension and Handling
A good suspension system is vital for a truck’s handling and stability. It helps absorb shocks, keeps traction, and makes navigating rough terrain smoother.
Price vs. Performance
It’s important to balance price vs. performance when picking a short course RC truck. While pricier models often have better performance, there are affordable ones that offer great value.
By looking at these factors, fans can choose the best short course RC truck for bashing.
Top Budget-Friendly Short Course RC Trucks
Budget-friendly short course RC trucks are a great way to enjoy the hobby without spending a lot. They offer a mix of performance and affordability. This makes them perfect for both newbies and seasoned enthusiasts.
Traxxas Slash 2WD
Overview
The Traxxas Slash 2WD is a favorite among RC fans. It’s known for its exceptional speed and durability. It’s great for bashing and can handle rough driving.
Pros
- High-speed performance: It’s fast, making it fun to drive.
- Durable construction: It can take crashes and rough terrain.
- Easy to maintain: It’s simple to keep up and upgrade.
Cons
It can be prone to rollovers if not driven carefully. The stock tires may not work well on some surfaces.
Features
The Traxxas Slash 2WD has a 2.4GHz radio system for precise control. It also has a powder-coated aluminum chassis for durability. Plus, it has a high-performance motor for quick acceleration.
Recommendations
Upgrading with aftermarket tires and a performance motor can improve the driving experience.

ARRMA Senton 3S BLX
Overview
The ARRMA Senton 3S BLX is also a top pick in the budget-friendly category. It’s known for its robust build quality and impressive performance on various terrains.
Pros
- Versatile performance: It works well on different surfaces, from dirt to asphalt.
- Strong 3S power system: The 3S battery gives enough power for high-speed driving.
- BLX brushless motor: It offers efficient power and longer runtime.
Cons
Some users say the stock electronics can be sensitive to moisture. So, be careful when driving in wet conditions.
Features
The ARRMA Senton 3S BLX has a SPEED PINION for the 3S motor. It also has a durable composite chassis and high-clearance suspension for better ground clearance.
Recommendations
Upgrading to waterproof electronics can make it more durable. Using high-quality batteries can also boost performance.
| Model | Speed | Durability | Price |
|---|---|---|---|
| Traxxas Slash 2WD | High | Excellent | $$ |
| ARRMA Senton 3S BLX | Very High | Excellent | $$$ |
Mid-Range Short Course RC Trucks for Serious Bashers
For those serious about bashing, mid-range short course RC trucks are a great choice. They offer a mix of quality and affordability. These trucks are perfect for those looking to improve their bashing experience.
Losi Tenacity SCT
Overview
The Losi Tenacity SCT is built for serious bashers. It’s tough and has a powerful motor for fast speeds.
Pros
This truck is exceptionally durable and can handle tough bashing. Its high-performance motor makes it fast and quick.
Cons
Some might find the stock tires not great on all surfaces. Upgrading them can help a lot.
Features
The Losi Tenacity SCT has cool features. It has a waterproof electronics system and a high-torque motor. It’s great for bashing in different conditions.
Recommendations
For better performance, upgrade the tires. Adding a LiPo battery also boosts power.
Team Associated SC10
Overview
The Team Associated SC10 is a top-notch short course truck. It’s known for its competition-level handling and durability. It’s a favorite among serious bashers who want precision and speed.
Pros
The SC10 handles amazingly well. It’s also super customizable, so you can make it your own.
Cons
The SC10 is a bit pricier. Some might find building it a bit tough.
Features
The Team Associated SC10 has a competition-tested design. It comes with top-notch parts for the best performance.
Recommendations
For the best experience, consider a high-performance motor. Also, tweak the suspension to fit your driving style.
Premium Short Course RC Trucks for Ultimate Bashing Experience
Get ready for the ultimate bashing experience with top-notch RC trucks. These premium short course RC trucks come with advanced features, superior build quality, and unmatched performance.

Traxxas Slash 4×4 Ultimate
Overview
The Traxxas Slash 4×4 Ultimate is a top choice for RC truck enthusiasts. It has a strong design, a powerful motor, and advanced suspension. This makes it perfect for bashing on different terrains.
Pros
Unmatched Durability: It can handle tough bashing sessions.
Exceptional Performance: It’s fast and agile.
Cons
It costs more than entry-level models.
Features
Advanced Suspension: It offers great stability and control.
Powerful Motor: It has high torque and speed.
Recommendations
It’s perfect for serious bashers who want a premium RC experience.
ARRMA Senton 6S BLX
Overview
The ARRMA Senton 6S BLX is a top model in short course RC trucks. It’s known for its tough build and high performance.
Pros
Robust Construction: It can handle harsh bashing conditions.
High-Speed Performance: It offers exciting bashing experiences.
Cons
It needs regular maintenance to stay in top shape.
Features
6S Power System: It provides incredible speed and acceleration.
BLX Brushless Motor: It ensures efficient and powerful performance.
Recommendations
It’s great for experienced bashers who love high-speed thrills.
| Model | Key Features | Price Range |
|---|---|---|
| Traxxas Slash 4×4 Ultimate | Advanced Suspension, Powerful Motor | $500-$600 |
| ARRMA Senton 6S BLX | 6S Power System, BLX Brushless Motor | $550-$650 |
Specialized Short Course RC Trucks for Extreme Bashing
For those who crave the ultimate bashing experience, specialized short course RC trucks are the way to go. These trucks are designed to withstand the rigors of extreme bashing. They offer durability and performance that can handle even the toughest terrains.
Losi Super Baja Rey
Overview
The Losi Super Baja Rey is a high-performance, 1/5 scale electric RC truck designed for serious bashers. It’s built with durability in mind, featuring a robust design that can withstand extreme conditions.
Pros
- Exceptional durability: Built to last, it withstands rough handling.
- High-performance capabilities: Offers high speed and agility.
- Advanced suspension system: Provides a smooth ride even on rough terrain.
Cons
While it’s a top-notch bashing truck, the Losi Super Baja Rey is priced accordingly. This makes it a significant investment.
Features
- Powerful motor: Delivers high torque for rapid acceleration.
- Waterproof electronics: Protects against damage from water and dust.
- Adjustable suspension: Allows for customization based on terrain.
Recommendations
For serious bashers looking for a high-performance truck, the Losi Super Baja Rey is an excellent choice.
HPI Baja 5SC
Overview
The HPI Baja 5SC is another highly regarded RC truck for extreme bashing. It’s known for its speed, agility, and durability. This makes it a favorite among RC enthusiasts.
Pros
- Fast and agile: Offers quick acceleration and sharp handling.
- Durable construction: Built to withstand the impacts of bashing.
- Easy to maintain: Features accessible components for simple upkeep.
Cons
Some users may find the HPI Baja 5SC to be slightly less stable at high speeds.
Features
- High-torque motor: Provides rapid acceleration.
- Oil-filled shocks: Offers a smooth ride and improved handling.
- Adjustable camber: Allows for fine-tuning of the truck’s suspension.
Recommendations
The HPI Baja 5SC is recommended for those seeking a balance between performance and durability.
Comparing 2WD vs 4WD Short Course RC Trucks
Short course RC trucks come in 2WD and 4WD, each suited for different terrains. Your choice affects your RC bashing experience.
Advantages of 2WD for Bashing
2WD trucks are light and simple, great for smooth tracks. They’re fast and agile, perfect for those who love speed.
Benefits of 4WD for Rough Terrain
4WD trucks excel on tough terrain with their superior traction and control. They’re stable and quick, ideal for rocky and bumpy tracks.
Which Drive System Is Best for Your Bashing Style
Choosing between 2WD and 4WD depends on your bashing style and terrain. 2WD is best for speed on smooth tracks. But, 4WD is better for rough terrain, giving you the control you need.
Essential Upgrades for Your Short Course RC Truck
To improve your RC truck experience, think about essential upgrades. These can boost your truck’s performance, durability, and bashing skills. Whether you’re a casual player or a serious enthusiast, the right upgrades can make a big difference.
Durability Upgrades
Boosting your truck’s durability is key for bashing. Look into heavy-duty shocks, reinforced chassis, and metal gear servos. These will help your truck handle impacts better and reduce damage risk. Some top durability upgrades are:
- Armor kits to protect important parts
- Heavy-duty batteries for more power and longer life
- Durable tires for better grip
Performance Enhancements
To enhance your truck’s performance, check out high-performance motors, ESC upgrades, and advanced suspension systems. These can improve speed, acceleration, and handling. Key performance upgrades include:
- High-torque motors for quicker starts
- Programmable ESCs for custom settings
- Adjustable suspension for better handling
Battery and Power System Improvements
Upgrading your battery and power system can greatly impact your truck’s performance. Consider using high-capacity LiPo batteries and efficient charging systems. These will give you longer run times and faster charging, keeping you racing longer. Some top battery upgrades are:
- High-capacity LiPo batteries for longer runs
- Smart chargers for safe and efficient charging
- Power distribution blocks for cleaner wiring
Maintenance Tips to Keep Your Best Short Course RC Truck Running Strong
Keeping your short course RC truck in good shape is key. It’s not just about cleaning. It’s about making sure every part works well.
Post-Bash Cleaning Routine
After a bashing session, your RC truck gets dirty. Start by using compressed air to blow out dirt from sensitive areas. Then, use a soft brush to clean the tires, wheels, and suspension.
Finish by wiping down the body and exterior parts with a damp cloth.
Regular Maintenance Schedule
Having a regular maintenance schedule is important. Check your truck’s manual for when to do maintenance. Clean the motor, ESC, and other electronics regularly.
Lubricate moving parts like the differential and suspension. Also, look for worn-out parts and replace them to avoid damage.
Common Issues and Quick Fixes
Short course RC trucks can have problems like overheating, losing traction, and steering issues. For overheating, make sure there’s good airflow around the motor and ESC. For losing traction, check the tires and adjust the suspension.
Steering problems might need adjustments to the steering linkage or replacing worn-out parts. Knowing these common issues helps you fix them fast.
By following these maintenance tips, your short course RC truck will stay in great shape. This means more fun bashing sessions ahead.
Conclusion
Finding the perfect short course RC truck for bashing is exciting. There are many models, each with special features. The key is to know what you need and want.
Whether you’re new to RC or a seasoned pro, the best trucks are durable, fast, and affordable. The Traxxas Slash and ARRMA Senton are favorites for their toughness and speed.
When picking a truck, think about its build, power, suspension, and cost. Also, upgrading and caring for your truck can make it last longer and perform better.
We’d love to hear about your RC truck adventures. Tell us about your favorite models and places to bash. This can help others choose the right truck.
FAQ
What is the best short course RC truck for beginners?
The Traxxas Slash 2WD is great for beginners. It’s durable and easy to use.
What is the difference between 2WD and 4WD short course RC trucks?
2WD trucks are lighter and more agile. 4WD trucks have more traction and stability, perfect for rough terrain.
How do I maintain my short course RC truck?
Clean it after each use. Check and replace worn parts. Make sure the battery and electrical systems are good.
Can I upgrade my short course RC truck?
Yes, you can upgrade with aftermarket parts. Look for performance motors, suspension, and battery systems.
What is bashing, and is it safe for my RC truck?
Bashing means driving aggressively on rough terrain. It’s fun but can be hard on the truck. Many trucks are made to handle it.
How do I choose the right short course RC truck for my needs?
Think about your budget, terrain, and experience. Research models, read reviews, and compare features to find the best truck.
What are some common issues with short course RC trucks, and how can I fix them?
Issues include worn tires, damaged suspension, and electrical problems. Regular checks and maintenance can help. Many problems can be fixed with simple repairs or replacements.
Can I drive my short course RC truck in the rain or on wet terrain?
Some trucks can handle wet conditions. Always check the manufacturer’s advice and protect the truck’s electrical parts.
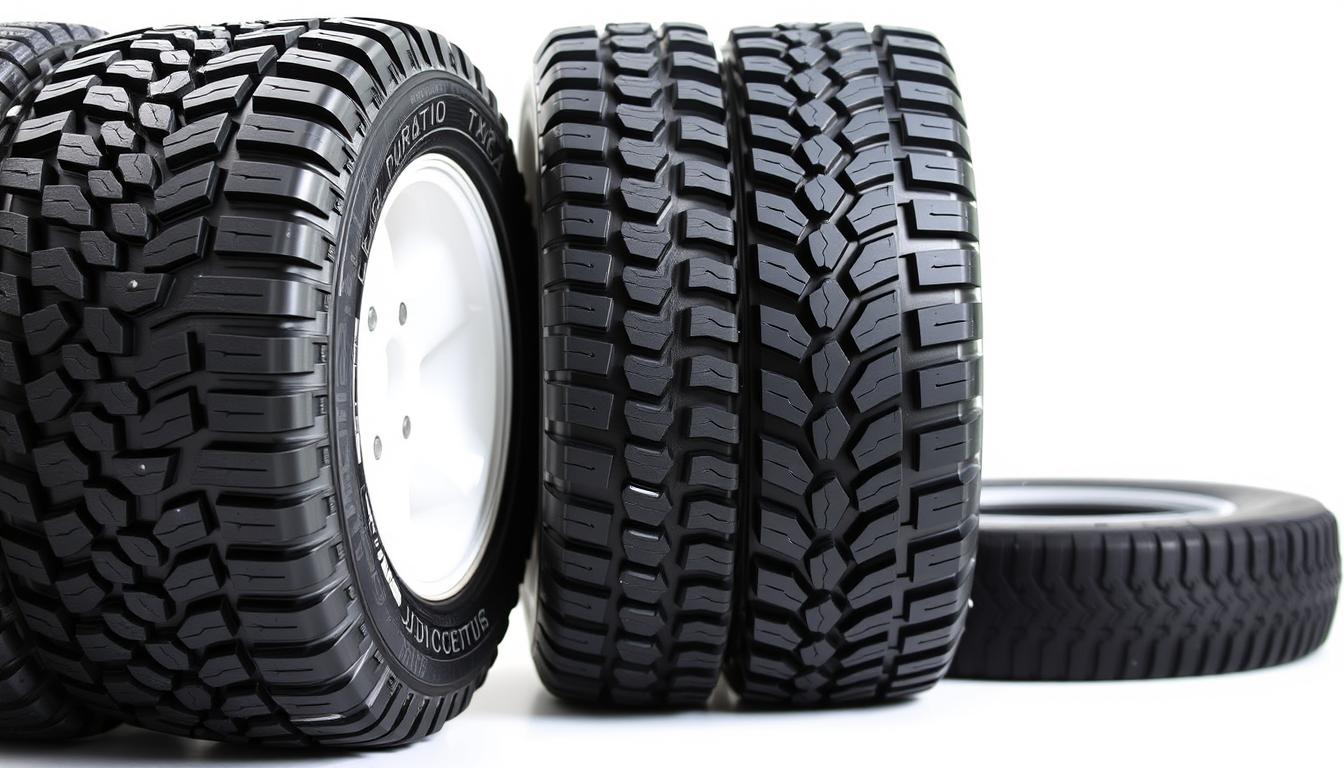
How to Choose the Right Tires for Off-Road RC Cars
Choosing the right tires for your off-road RC car can really boost its performance. There are many options out there, making it hard to pick the best ones.
Brands like Pro-Line and Duratrax make high-quality tires for off-road. Knowing the differences between them is key to making a good choice.
This article will help you find the perfect tires for your off-road RC car. We’ll compare top brands and share what makes them stand out.
Key Takeaways
- Understand the importance of tire selection for off-road RC cars.
- Compare top brands like Pro-Line and Duratrax.
- Learn about the different types of tires for various terrains.
- Discover how to choose the right tires for your RC car’s specific needs.
- Gain insights into the performance of different tire brands.
Understanding RC Off-Road Tire Basics
For any serious RC off-road fan, knowing the basics is key. These tires are made to give you grip, stability, and control on different grounds.
Tire Components and Construction
RC off-road tires have a few main parts. These include the rubber compound, the internal structure, and foam inserts. The rubber compound is what makes the tire stick and last long.
Rubber Compounds and Internal Structure
The rubber in RC off-road tires can be soft or hard. Soft rubber gives better grip, but hard rubber lasts longer. The internal structure, like the casing and reinforcements, makes the tire strong and flexible.
Foam Inserts and Their Purpose
Foam inserts add support and stability to RC off-road tires. They help keep the tire’s shape and improve its performance on different grounds.
The Impact of Tire Choice on Performance
Choosing the right RC off-road tires is very important. It affects how well your vehicle handles, its speed, and how well it grips the ground.
Traction Variables
Traction depends on the tire’s design, rubber, and the ground it’s on. Different tires work better on different surfaces, like dirt, rock, or sand.
Weight and Rotational Mass Effects
The weight and how easily the tires rotate also matter. Lighter tires with less rotational mass can make your vehicle go faster and handle better.
| Tire Component | Function | Impact on Performance |
|---|---|---|
| Rubber Compound | Affects grip and durability | Influences traction and handling |
| Internal Structure | Provides strength and flexibility | Affects tire’s overall performance and durability |
| Foam Inserts | Provides additional support and stability | Improves tire’s performance on various terrains |
Why Tire Selection Matters for Off-Road RC Performance
Off-road RC fans know that choosing the right tires is essential. The correct tires can boost performance, durability, and the driving fun of their RC cars.
Traction and Handling Considerations
Traction is vital for off-road RC cars. It affects how well they can speed up, slow down, and turn. Tire tread design and compound are key to getting the best traction.
Cornering Stability
Cornering stability comes from the tire’s grip on the ground. This keeps the car stable and prevents it from sliding. Wide, sticky tires help with this.
Acceleration and Braking Performance
The right tires improve acceleration by giving the car the grip it needs. They also help with braking by preventing the tires from sliding when they lock up.
Durability and Longevity Factors
Durability is important when picking RC tires. It affects how long they last and how well they perform. Tire compound and construction are key to durability.
Wear Patterns and Lifespan
Knowing how tires wear can help predict when they need to be replaced. Taking good care of them can make them last longer.
Cost-Effectiveness Over Time
Even though high-quality tires cost more at first, they can save money in the long run. They last longer and perform better consistently.
| Tire Feature | Impact on Performance | Impact on Durability |
|---|---|---|
| Tread Design | Improves traction and handling | Affects wear patterns |
| Tire Compound | Influences grip and cornering stability | Impacts lifespan and durability |
| Tire Width | Enhances cornering stability and traction | Affects wear and longevity |
Types of RC Off-Road Terrain and Suitable Tires
Knowing the types of RC off-road terrain and picking the right tires is key. RC off-road vehicles are made to handle different terrains. Each terrain has its own challenges and needs.
Dirt and Loose Soil Conditions
Dirt and loose soil are common for RC off-road fun. The right tires can make a big difference in performance.
Pin Tires for Maximum Grip
Pin tires work great on dirt and loose soil. They dig into the ground, giving maximum grip. This helps keep control and reach high speeds.
Soft Compound Advantages
Tires with soft compounds stick better on loose surfaces. They mold to the terrain, improving grip and handling.
Rocky and Hard-Packed Surfaces
Rocky and hard-packed surfaces are tough. They need tires that can handle rough conditions and keep performing.
Block Pattern Benefits
Tires with a block pattern are good for rocky terrains. The blocks help with stability and control on hard surfaces.
Medium-Hard Compound Recommendations
For rocky and hard-packed surfaces, medium-hard compound tires are best. They balance durability and traction, keeping performance up even on rough terrain.
Mud, Snow, and Wet Conditions
Mud, snow, and wet conditions need special tires. These tires are made for slippery and thick terrains.
Paddle and Specialized Tread Designs
Paddle tires and specialized tread designs are great for mud and wet. They help push water and mud away, keeping contact with the ground.
Waterproof Considerations
In wet conditions, waterproofing is key. Some tires have features to keep water out. This helps keep performance steady.
The Best RC Off-Road Tires for Different Vehicle Classes
The world of RC off-road tires is vast. Each vehicle class needs specific tires for the best performance. Whether it’s a monster truck, buggy, truggy, or short course truck, the right tires are key.
Monster Truck Tire Options
Monster trucks need tires that handle high torque and provide enough traction. Two top picks are:
Pro-Line Destroyer and Trencher MT Series
The Pro-Line Destroyer and Trencher MT Series offer great traction and durability. They have aggressive tread patterns for rough terrains and grip at high speeds.
Duratrax Showdown CR Tires
Duratrax Showdown CR Tires balance grip and durability well. They work on various surfaces, including dirt and loose soil.
Buggy and Truggy Tire Selections
Buggies and truggies need tires that mix traction and speed. Some top picks are:
JConcepts Dirt Webs and Ellipses
JConcepts Dirt Webs and Ellipses are favorites for buggies and truggies. They grip well on dirt and are fast.
Pro-Line Hole Shot Series
The Pro-Line Hole Shot Series offers a unique tread pattern. It boosts acceleration and cornering grip.
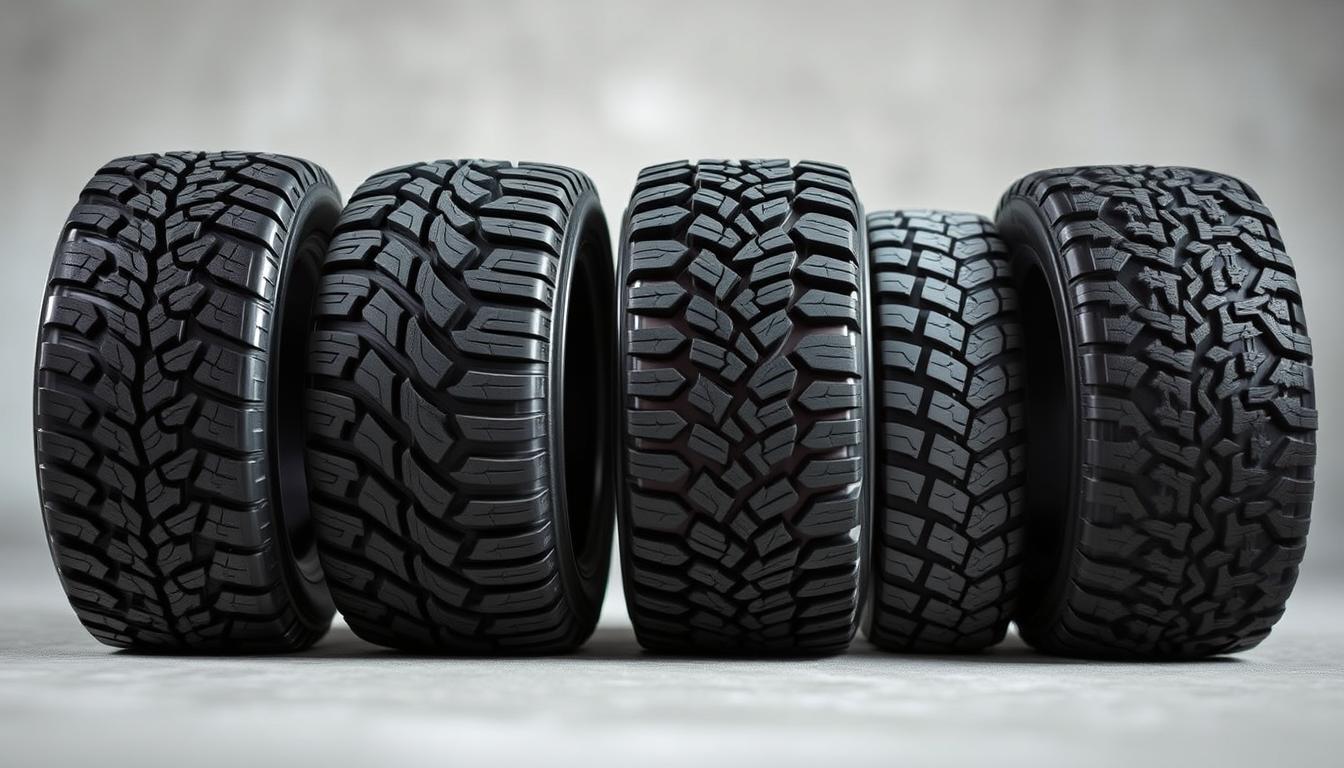
Short Course Truck Tire Recommendations
Short course trucks require tires for high-speed cornering and braking. Here are some good options:
Pro-Line Badlands SC
Pro-Line Badlands SC tires are made for short course racing. They provide the grip and durability needed for fast runs.
Duratrax Picket RC Short Course Tires
Duratrax Picket RC Short Course Tires offer great traction. They’re built to last through short course racing.
Choosing the right RC off-road tires depends on your vehicle class and terrain. Tires from Pro-Line, Duratrax, and JConcepts ensure top performance and durability.
Tire Size and Scale Considerations
RC off-road fans need to know about tire size and scale. The right size and scale can make your RC car better. It can improve how it handles, goes fast, and lasts longer.
Finding the Right Diameter and Width
Choosing the right tire diameter and width is key. The diameter changes how fast your RC car goes and how it’s geared. The width affects how well it grips the ground and turns.
Clearance Requirements
It’s important to have enough space between the tires and the RC car’s body. Proper clearance stops rubbing and damage. It also makes your RC car run smoother and last longer.
Impact on Gearing and Speed
The tire diameter affects your RC car’s gearing and speed. A bigger diameter means faster speeds but might need different gearing for best performance.
Matching Tires to Your RC Vehicle’s Scale
It’s important to match your RC vehicle’s tires to its scale. Different scales, like 1/10, 1/8, and 1/5, need specific tires.
1/10 Scale Tire Options
For 1/10 scale RC cars, there are many tire sizes and widths. Choosing the right tire can boost your RC car’s performance and durability.
1/8 and 1/5 Scale Considerations
Bigger scales, like 1/8 and 1/5, need bigger and stronger tires. These tires must handle the extra power and weight of larger RC cars.
Understanding Tire Compounds and Their Properties
Knowing about different tire compounds is key for better RC off-road performance. These compounds greatly affect how well RC vehicles grip and last on different terrains.
Soft vs. Medium vs. Hard Compounds
RC tires come in soft, medium, and hard compounds. Each type has its own strengths and weaknesses. Soft compounds give the best grip but wear out quicker. Hard compounds last longer but might not grip as well.
Soft Compounds: Great for slippery or loose surfaces, they offer top grip.
Medium Compounds: They balance grip and durability, good for many terrains.
Hard Compounds: Last longer but might not grip as well.
Pro-Line M3 and M4 Compounds
Pro-Line’s M3 and M4 compounds are known for their great performance. The M3 compound offers good grip and durability for various off-road conditions. The M4 compound is softer, giving better grip on loose surfaces.
JConcepts Gold and Blue Compounds
JConcepts has Gold and Blue compounds for different needs. The Gold compound is durable and performs well in different temperatures. The Blue compound is softer, giving better grip on high-grip surfaces.
Temperature Effects on Tire Performance
Temperature changes a lot how RC tires perform. Different compounds react differently to temperature, affecting grip, durability, and performance.
Cold Weather Tire Selection
In cold weather, softer compounds lose effectiveness as they harden. Harder compounds may last longer but can be too hard for good grip.
Hot Weather Performance Considerations
In hot weather, softer compounds can become too soft, leading to faster wear and overheating. Harder compounds might do better in heat because they last longer and resist heat better.
| Compound Type | Cold Weather Performance | Hot Weather Performance |
|---|---|---|
| Soft | Reduced grip due to hardening | Faster wear and possible overheating |
| Medium | Balanced performance | Moderate wear |
| Hard | Better durability but less grip | Improved durability and heat resistance |
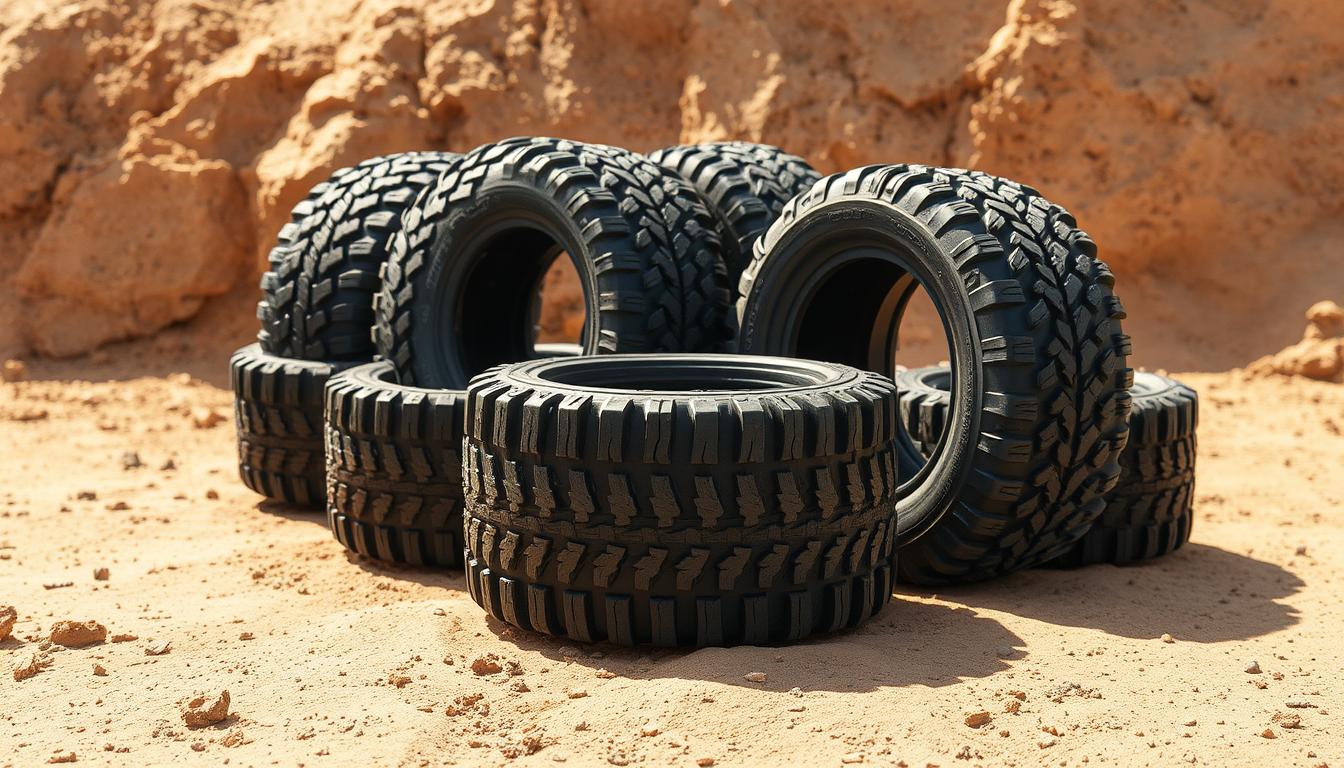
The Best RC Off-Road Tires for Various Terrains
Off-road RC adventures need tires that can handle different terrains. From sandy dunes to clay tracks, the right tires make a big difference. They improve your RC vehicle’s performance, giving better traction, control, and durability.
Desert and Sand Running
Paddle tires are best for desert and sand running. They dig into the sand, giving traction. Paddle Tires from Pro-Line and Louise RC are top picks for sandy conditions.
Paddle Tires from Pro-Line and Louise RC
These tires have a special design for maximum traction in loose sand. Their paddle-like structure helps dig into the sand. This improves the vehicle’s mobility in sandy terrains.
Ribbed Front Tire Benefits
Ribbed front tires offer better steering control and stability on sandy or desert terrains. They help keep the vehicle’s direction and make driving smoother.
Clay and Loam Track Surfaces
For clay and loam tracks, tires with aggressive tread patterns are needed. JConcepts Bar Codes and Dirt Webs are favorites among RC fans for these conditions.
JConcepts Bar Codes and Dirt Webs
JConcepts Bar Codes have a unique tread pattern for great grip on clay and loam. Dirt Webs have a different design that works well on these terrains, ensuring top performance.
Pro-Line Positron and Electron Options
Pro-Line’s Positron and Electron tires are also highly regarded for clay and loam tracks. They balance grip and durability, making them great for racing.
Grass and Turf Performance
For grass and turf, tires need aggressive tread to handle the slippery surface. Duratrax Lockup and Scuff Tires are known for their performance on grass and turf.
Aggressive Tread Requirements
Aggressive tread patterns are key for grip on grassy surfaces. Tires with deeper treads can handle grass’s slickness, providing the needed traction.
Duratrax Lockup and Scuff Tires
Duratrax Lockup tires offer excellent grip on grass. Scuff Tires have a softer compound for better traction. Both are great for RC vehicles on grass or turf.
Choosing the right tires for your RC off-road vehicle is key for the best performance. By picking terrain-specific tires from brands like Pro-Line, JConcepts, and Duratrax, RC fans can enjoy better control, speed, and driving experience.
Pro-Line RC Off-Road Tire Options
Pro-Line RC tires have changed off-road racing with their new designs and top performance. They offer many options for RC fans, from hobbyists to pro racers.
Pro-Line Badlands Series Review
The Badlands series by Pro-Line is famous for its great traction and lasting power on different off-road grounds. It includes models like MX, MX28, and MX43, each made for different conditions.
MX, MX28, and MX43 Variants
The MX, MX28, and MX43 tires have special tread patterns and compounds for different off-road situations. For example, the MX43 has a bold tread pattern for better grip on loose and rocky areas.
Performance in Various Conditions
Pro-Line Badlands tires work well on many terrains, like dirt, rock, and sand. Their flexibility makes them a favorite among RC fans who race on different off-road tracks.
Pro-Line Trencher and Destroyer Lines
Pro-Line also has the Trencher and Destroyer lines, loved by monster truck fans and those racing on tough terrains.
X-MAXX and Monster Truck Applications
The Trencher and Destroyer tires are made for big monster trucks like the X-MAXX. They have strong builds and aggressive tread patterns for high-power RC monster trucks.
Durability Features
These tires are made to last, with reinforced builds for off-road racing and bashing. Their lasting quality makes them a smart choice in the long run.
Pro-Line Specialty Terrain Tires
Pro-Line also has specialty terrain tires for specific conditions, like the Hyrax Rock Terrain Tires and Bogger Mud-Specific Options.
Hyrax Rock Terrain Tires
The Hyrax tires are made for rock crawling and have unique tread patterns for the best grip on rocky surfaces.
Bogger Mud-Specific Options
The Bogger tires are for muddy conditions, with tread patterns that help clear mud and keep traction.
| Tire Model | Tread Pattern | Terrain |
|---|---|---|
| Badlands MX | Aggressive | Dirt, Rock |
| Trencher | Robust | Mud, Sand |
| Hyrax | Specialized | Rock |
Duratrax RC Off-Road Tire Lineup
Duratrax is a well-known name in the RC world. They offer a wide range of off-road tires for different terrains and vehicles. Their tires are perfect for both casual players and serious racers.
Duratrax Lockup and Picket Series
The Lockup and Picket series from Duratrax are favorites among RC fans. They perform well on various off-road terrains.
The Lockup series has an aggressive tread for better grip on loose surfaces. The C2 compound options in the Lockup series balance durability and grip. This makes them great for many driving conditions.
C2 Compound Options
The C2 compound is versatile, balancing grip and durability well. It’s perfect for drivers who face different terrains without needing to change tires often.
Pre-Mounted Convenience
Duratrax offers pre-mounted tires for convenience. This saves time and effort for RC fans. It’s great for beginners or those who want an easy experience.
Duratrax Budget-Friendly Options
Duratrax also has affordable off-road tires for those on a budget.
These affordable tires offer good performance without costing too much. A performance vs. price analysis shows Duratrax’s budget tires are a smart choice.
Performance vs. Price Analysis
Duratrax’s budget tires are a great value. They offer good grip and durability at a lower price. This makes them a popular choice among RC fans.
Beginner-Friendly Selections
For new RC hobbyists, Duratrax’s budget options are a great starting point. They offer a forgiving platform for learning without the high cost of premium tires.
JConcepts and Other Premium Brand Options
RC fans looking for the best performance can find it in JConcepts and other top brands. These brands are known for their high-quality tires. They work well for different RC vehicles and terrains.
JConcepts Competition-Grade Tires
JConcepts is a top name in the RC world, known for its competition-grade tires. Their tires are made to perform well on many surfaces.
Dirt Webs and Renegades Performance
The Dirt Webs and Renegades series from JConcepts are favorites for their great traction and durability on dirt. These tires are built for consistent performance, perfect for racing.
Racing Applications
JConcepts tires are popular in racing for their high performance. The brand’s commitment to innovation and quality makes them a favorite among pros.
AKA, GRP, and Louise RC Alternatives
Other top brands like AKA, GRP, and Louise RC also offer high-quality off-road tires. They give RC fans more options for high-performance tires.
AKA EVO Series Comparison
The AKA EVO series is known for its amazing grip and durability. It outshines other premium tires in tough terrains.
GRP Competition Tires
GRP competition tires are for serious RC fans who want the best. They offer superior traction and handling, great for racing.
Wheel and Tire Compatibility Considerations
It’s important to match your RC car’s wheels and tires for the best performance. The right pair can improve how your car handles, speeds up, and lasts longer.
Bead Designs and Mounting Systems
The tire bead’s design and the wheel’s mounting system are key for a tight fit. A good bead keeps the tire in place, preventing it from slipping or falling off.
Standard vs. Hex Mounting
Mounting systems come in two main types: standard and hex. Standard mounting is common and works well. Hex mounting gives an even tighter fit, helping to stop the tire from slipping.
Gluing Techniques and Materials
For some tires and wheels, you need to glue them together for a strong bond. There are many glues and ways to apply them. The right glue and method can make your tire and wheel last longer and perform better.
Wheel Material Impact on Performance
The material of your RC car’s wheels affects its performance. Different materials have different strengths, weights, and durability levels.
Plastic vs. Aluminum Wheels
Plastic wheels are light and affordable, making them popular. But they might not last as long as aluminum wheels, which are stronger and can take more hits.
Weight Distribution Effects
The weight of your RC car’s wheels can change how it handles and stays stable. The right weight can help with cornering and prevent rollovers. Think about the weight of your wheels when picking them out.
- Make sure your wheel and tire match well for the best performance.
- Think about the terrain and how you drive when picking materials.
- Check your tire and wheel often for wear or damage.
Pro-Line vs. Duratrax vs. JConcepts: Brand Comparison
Pro-Line, Duratrax, and JConcepts are well-known in the RC off-road world. But how do they stack up? Knowing the differences between these top brands is key when picking tires for your RC.
Quality and Durability Differences
The quality and durability of RC tires depend on their materials and construction. Rubber compound longevity is a big factor. It determines how well tires last against wear and tear.
Rubber Compound Longevity
Pro-Line is famous for its long-lasting rubber compounds. Duratrax also offers tough tires, but some say they’re not as durable as Pro-Line. JConcepts, though, is known for its high-quality rubber that balances durability with performance.
Sidewall Construction Comparison
The sidewalls of these brands differ. Pro-Line and JConcepts often have reinforced sidewalls for extra strength. Duratrax, on the other hand, has various constructions for different driving styles and terrains.
Price Point Comparison
Price is a big deal for RC fans. Tire costs vary a lot based on brand, quality, and model.
Budget-Friendly Options
Duratrax is known for its affordable options without sacrificing too much quality. Pro-Line and JConcepts, while pricier, offer high performance and durability that justifies their cost.
Premium Performance Cost Analysis
Spending on premium tires like Pro-Line and JConcepts can really improve your RC experience. They offer better traction and last longer. The higher cost is worth it for serious enthusiasts.
Performance in Competition Settings
In RC racing, the right tires can be a game-changer. Professional driver preferences often go to brands known for consistent performance and reliability.
Professional Driver Preferences
JConcepts is a favorite among professional drivers for its high-performance tires. Pro-Line also has a strong following among racers.
Racing Success Records
Both Pro-Line and JConcepts have impressive racing records, with many wins in big RC competitions. Duratrax, while not as common in top-tier racing, offers competitive tires.
Maintaining Your RC Off-Road Tires
Keeping your RC off-road tires in good shape is key for top performance and long life. Regular care helps your tires grip and handle well on different surfaces.
Cleaning and Storage Best Practices
Cleaning your RC tires often is important to get rid of dirt and debris. Use a soft brush and mild soap. Stay away from harsh chemicals that can harm the rubber.
Removing Debris and Mud
After each use, check your tires for dirt or mud. Use a soft-bristled brush to remove any stuck material. This keeps your tires clean and ready to go.
Preventing Rubber Deterioration
Keep your RC tires in a cool, dry spot, away from sunlight. Don’t store them near heating vents or in hot places. This helps prevent rubber damage.
When to Replace Your RC Tires
It’s important to know when to replace your RC tires. Look for signs of wear and damage.
Wear Indicators and Signs
Regularly check your tires for wear signs like thin tread or uneven wear. If you see these, it’s time for new tires.
Performance Degradation Symptoms
If your RC vehicle’s performance drops, like less grip or handling problems, it might need new tires.
| Maintenance Task | Frequency | Benefit |
|---|---|---|
| Cleaning Tires | After each use | Improved Performance |
| Inspecting for Wear | Weekly | Early Detection of Issues |
| Proper Storage | When not in use | Extended Tire Life |
Budget Considerations When Buying RC Off-Road Tires
When buying RC off-road tires, budget is key. RC fans must find a balance between wanting top performance and keeping costs down. This ensures they get the most value for their money.
Premium vs. Budget Tire Options
The market has many RC off-road tires. You can find affordable options like Hobby King and generic brands. Or, you can choose premium brands for better performance and durability.
Hobby King and Generic Alternatives
Hobby King and generic brands are great for those on a tight budget. They might not match premium brands in performance. But, they’re good enough for casual users.
When to Invest in Premium Brands
For serious enthusiasts, premium RC off-road tires are a smart choice. They’re perfect for competitions or if you need top-notch performance. Premium tires have advanced features like better traction and durability, making them worth the extra cost.
Value for Money Analysis
To find the best value, consider the cost per run. It’s important to balance performance with price.
Cost Per Run Calculations
Calculating cost per run means dividing the total cost by the number of runs or hours. This shows the true cost-effectiveness of the tires.
Balancing Performance and Price
Finding the right balance between performance and price is essential. Premium tires offer better performance, but budget options can also deliver good results at a lower cost. It’s about choosing what fits your RC activities and budget.
Common Mistakes to Avoid When Selecting RC Off-Road Tires
The right RC off-road tires can make or break your adventure. Many hobbyists make critical errors in their selection process. Understanding these mistakes is key to optimizing your RC vehicle’s performance.
Overlooking Terrain Compatibility
One big mistake RC enthusiasts make is not considering the terrain. Different terrains need different tire specifications.
Matching Tread to Surface Type
Tires with the right tread pattern can improve traction a lot. For example, deep, aggressive tread patterns are great for muddy or loose surfaces. On the other hand, smoother treads work better for hard-packed dirt or rocky terrains.
Seasonal Considerations
Seasonal changes can also affect the terrain. For instance, tires that work well in dry conditions might not be good for wet or snowy conditions. Adjusting your tires according to the season can improve performance and longevity.
Ignoring Vehicle Weight and Power
Another critical mistake is not matching the tire specifications with the vehicle’s weight and power output.
High-Powered Vehicle Requirements
For high-powered RC vehicles, stronger, more durable tires are needed. These tires can handle the increased stress and speed. They maintain grip under intense conditions.
Lightweight Chassis Considerations
On the other hand, for lightweight RC chassis, lighter tires are better. They improve handling and reduce weight. This makes the vehicle more agile and efficient.
| Vehicle Type | Tire Recommendation | Terrain Suitability |
|---|---|---|
| High-Powered RC | Strong, Durable Tires | Rocky, Hard-Packed |
| Lightweight RC | Lightweight Tires | Muddy, Loose Surfaces |
By avoiding these common mistakes, RC enthusiasts can improve their vehicle’s performance. This can also enhance their overall RC experience.
Conclusion: Making the Right Tire Choice for Your RC Adventures
Choosing the best RC off-road tires is key for a fun and successful RC adventure. The right tires can greatly improve your vehicle’s performance and handling. They also make your RC last longer.
Several factors are important when picking tires. These include the terrain, the type of RC, the tire’s compound, and its size. Brands like Pro-Line, Duratrax, and JConcepts have many high-quality options. Each has its own special features and benefits.
Think about what you’ll be doing with your RC. If you race or go off-roading, the right tires are essential. They will make your experience better and help you perform at your best.
Understanding the importance of tire selection is important. By considering the factors we talked about, you can make a smart choice. This will make your RC adventures more exciting and rewarding.
FAQ
What are the best RC off-road tires for rocky terrain?
For rocky terrain, choose tires with a block pattern and a medium-hard compound. Pro-Line’s Badlands series and Duratrax’s Picket RC Short Course Tires are good options.
How do I choose the right tire size for my RC vehicle?
Consider your RC vehicle’s scale and clearance needs. Also, think about how the tire size affects gearing and speed. For example, 1/10 scale vehicles need tires with a diameter between 3.5 and 4.5 inches.
What is the difference between soft, medium, and hard tire compounds?
Soft compounds grip well but wear out faster. Hard compounds last longer but offer less traction. Medium compounds find a balance between grip and durability. Pro-Line’s M3 and M4 compounds are examples of soft and medium compounds, respectively.
Can I use the same tires for different types of terrain?
While some tires can handle various terrains, it’s best to use specific tires for each terrain. For example, paddle tires are great for mud and sand. Block pattern tires are better for rocky terrain.
How do I maintain my RC off-road tires?
Clean your RC off-road tires regularly to remove debris and mud. Store them in a cool, dry place to prevent rubber deterioration. Check for wear indicators and signs of damage.
What are the benefits of using foam inserts in my RC tires?
Foam inserts help keep tire shape and provide a consistent ride. They also improve traction. They’re useful for off-road RC cars, absorbing shocks and maintaining tire pressure.
How do I know when to replace my RC tires?
Replace your RC tires when they show signs of excessive wear, like worn-down tread or damaged sidewalls. Also, check for performance degradation, such as reduced traction or handling.
Are budget-friendly tire options worth considering?
Budget-friendly tire options, like those from Hobby King, are good for beginners or casual use. But, premium brands like Pro-Line, Duratrax, and JConcepts offer better performance and durability.
Can I glue my RC tires to the wheels?
Yes, gluing your RC tires to the wheels can provide a more secure fit. Use a suitable adhesive, like tire glue, and follow the manufacturer’s instructions.
What are the advantages of using aluminum wheels over plastic wheels?
Aluminum wheels are stronger and more durable than plastic wheels. They also provide better heat dissipation. This can improve handling and performance, even in high-power applications.
RC LiPo Battery Buying Guide: Safe, Fast & Long-Lasting
RC LiPo Battery Buying Guide: Safe, Fast & Long-Lasting
Choosing the right RC LiPo battery can be tough, especially for newcomers. With many options, it’s key to think about safety, performance, and longevity. This ensures a great RC experience.

best RC LiPo batteries
A safe and dependable battery is vital to avoid accidents and damage. A top-notch LiPo battery gives the power for quick and efficient performance. It also handles regular use well.
Key Takeaways
- Understand the importance of LiPo battery safety when choosing an RC battery.
- Learn how to select a battery that meets your performance needs.
- Discover the benefits of a high-quality RC LiPo battery.
- Find out how to prolong the lifespan of your LiPo battery.
- Explore the key features to look for in a reliable RC LiPo battery.
Understanding RC LiPo Batteries
RC LiPo batteries are key for hobbyists wanting to boost their device’s performance. These rechargeable batteries are a staple in the RC world.
What Makes LiPo Batteries Different
LiPo batteries stand out because of their special chemistry and design. They use lithium-ion tech, offering a lot of power in a small package. This is great for RC toys where size and weight matter.
Key characteristics of LiPo batteries include cell count, capacity, and C-rating. These details help figure out how well a battery will work with RC devices.
Key Advantages for RC Hobbyists
LiPo batteries have big key advantages for RC fans. They can handle high discharge rates and are flexible in how you can set them up. This lets you adjust the battery’s power to fit your RC’s needs.
Also, LiPo batteries give steady power all the way until they’re almost empty. This means your RC will keep performing well until the battery runs out.
Essential LiPo Battery Specifications Explained
Knowing about LiPo battery specs is key to picking the right one for your RC device. LiPo batteries have important specs that affect their performance, safety, and how well they work with your RC.
Capacity and Discharge Rate (C-Rating)
The capacity of a LiPo battery shows how much energy it holds. It’s measured in milliampere-hours (mAh). A bigger capacity means your RC can run longer. The discharge rate, or C-Rating, shows how fast the battery can give out energy. A higher C-Rating means it can handle more demanding tasks.
- Low C-Rating (10C-20C): Good for slower, less demanding RC devices.
- Medium C-Rating (20C-30C): Perfect for general RC use, balancing runtime and performance.
- High C-Rating (50C or higher): Made for high-performance RC devices needing quick energy discharge.
Cell Count and Voltage
The cell count and voltage of a LiPo battery are key for matching with your RC device. LiPo batteries come in ‘S’ configurations, where ‘S’ is the number of cells in series. Each cell is 3.7V, so a 2S battery is 7.4V, a 3S is 11.1V, and so on.
Picking the right voltage is vital for your RC device to work right. A battery with too low a voltage might not perform well. Too high a voltage can harm your device.
Size, Weight, and Connector Types
The physical features of a LiPo battery, like size, weight, and connector type, matter too. The size and weight can impact your RC’s balance and handling. Connector types include XT60, Deans, and EC3. Make sure the connector type fits your device for safe and easy use.
The Best RC LiPo Batteries for Different Applications
Choosing the right LiPo battery for your RC car, truck, or aircraft can be tough. The right battery can make your RC experience better. It gives you more power, longer playtime, and is more durable.
Top Batteries for RC Cars and Trucks
RC cars and trucks need batteries that can handle high discharge rates and last long. Here are some top picks:
High-Performance Options
If you want the best performance, check out the Turnigy Graphene. It has high discharge rates and lasts a long time. It’s perfect for competitive racers who need reliable power.
Budget-Friendly Choices
Not everyone needs the most expensive batteries. For those on a budget, the Zeee LiPo is a great choice. It offers good performance at a lower cost, perfect for casual users.
| Brand | Capacity (mAh) | Discharge Rate (C) | Price ($) |
| Turnigy Graphene | 5000 | 65 | 79.99 |
| Zeee LiPo | 5200 | 50 | 49.99 |
Premium Options for RC Aircraft
RC aircraft need batteries that balance weight, capacity, and discharge rate. Here are some premium options:
Drone-Specific Batteries
Drones do well with lightweight batteries that can discharge quickly. The Tattu 3S LiPo is a favorite among drone fans for its reliability and performance.
Airplane and Helicopter Batteries
For airplanes and helicopters, the Gens Ace Soaring batteries are a good choice. They provide the power and durability needed for smooth flights.
Reliable Choices for RC Boats
RC boats need batteries that can handle high discharge rates and provide steady power. Look for batteries with strong construction and high C-ratings.
Choosing the right LiPo battery can greatly improve your RC experience. Whether you’re racing cars, flying drones, or sailing boats, the right battery makes a big difference.
Top LiPo Battery Brands Compared
The RC community relies on a few top LiPo battery brands for power and reliability. Each brand has its own strengths and weaknesses. Knowing these helps you choose the right one for your needs.
Turnigy: Performance and Value
Turnigy LiPo batteries are known for their great performance and affordable price. They come in various capacities and discharge rates. This makes them perfect for both casual flying and serious racing. Turnigy batteries are a popular choice among hobbyists because they’re reliable and offer good value.
Tattu: Premium Quality
Tattu LiPo batteries are known for their high quality and performance. They meet the needs of serious RC enthusiasts with their high discharge rates and durable build. Tattu’s focus on quality has made them a favorite among professionals and serious hobbyists.
Gens Ace: Reliability and Consistency
Gens Ace LiPo batteries are known for their reliability and consistency. They provide a stable power source for RC vehicles, ensuring smooth operation and a long lifespan. Gens Ace batteries are trusted by many in the RC community for their performance and durability.
Zeee and Ovonic: Budget-Friendly Options
Zeee and Ovonic LiPo batteries are budget-friendly without sacrificing essential performance features. They’re great for beginners or those on a tight budget. While they may not have the premium quality of other brands, they offer value for money and are worth considering for less demanding applications.
When picking a LiPo battery brand, think about your specific needs. Consider the type of RC vehicle, the required capacity, and discharge rate. By understanding each brand’s strengths, you can make a choice that fits your performance and budget needs.

Top LiPo Battery Brands
LiPo Battery Safety: Critical Practices
LiPo battery safety is key for RC hobbyists. It’s about careful handling and following rules. This helps avoid accidents like fires or explosions.
Charging Safety Guidelines
Safe charging is crucial to avoid LiPo battery accidents. Always use a LiPo-compatible charger and follow the instructions. Never leave batteries charging alone, and keep them away from things that can catch fire.
It’s also important to watch the battery’s temperature and voltage while it’s charging.
“A LiPo battery should never be charged to more than 4.2V per cell, as overcharging can lead to a fire.”
Storage and Transportation
Safe storage and transport of LiPo batteries are key. Store them in a fireproof LiPo bag or container. Keep them away from metal and in a cool, dry spot.
When moving LiPo batteries, use a protective bag. Make sure they’re not damaged or short-circuited.
- Store LiPo batteries at a storage voltage (around 3.8V per cell) to extend their life.
- Avoid storing LiPo batteries in extreme temperatures.
Handling Damaged Batteries
If a LiPo battery is damaged, handle it carefully. Don’t touch it if it’s swollen or leaking, as it can burn you. Put the damaged battery in a fireproof container and dispose of it properly. Never try to charge a damaged LiPo battery.
By sticking to these safety tips, RC hobbyists can lower the risks of LiPo batteries. This way, they can enjoy their hobby safely and with confidence.
How to Maximize LiPo Battery Lifespan
To make your LiPo battery last longer, focus on charging, discharging, and storage. Knowing the best practices can greatly extend your battery’s life. This ensures it works at its best.
Proper Charging Techniques
Charging your LiPo battery right is key. Use a quality charger that balances the cells. Never overcharge, as it can harm the battery.
Experts say, “A charger that balances cells helps avoid overcharging. This reduces damage to the battery.”
“A good charger is an investment that pays off in the long run by extending the life of your LiPo batteries.”
Optimal Discharge Practices
Discharge your battery wisely. Avoid letting it go below 3.0V per cell. Stick to the C-rating recommended by the maker. Discharging too low can shorten your battery’s life.
Storage Voltage and Temperature
Store your LiPo batteries at the right voltage (around 3.8V per cell) and temperature (40°F to 80°F or 4°C to 27°C). Keep them away from hot environments. Don’t store them fully charged or fully discharged for too long.
By storing your LiPo batteries correctly, you keep them healthy. “Proper storage is key to maintaining the health and longevity of your LiPo batteries,” experts agree.
Essential LiPo Battery Accessories
To get the most out of your LiPo battery, you need the right accessories. These items improve performance and keep you safe while charging, storing, and using your battery.
Quality Chargers and Balancers
A top-notch charger is key for your LiPo battery’s health. Smart chargers can automatically adjust to your battery’s type and condition. This ensures it’s charged correctly.
Smart Chargers
Smart chargers charge LiPo batteries safely and efficiently. They balance cells, watch temperature, and stop overcharging.
Balance Boards
Balance boards are vital for keeping all cells in a LiPo pack charged evenly. This keeps your battery healthy and extends its life.
Safety Bags and Storage Solutions
Safety bags are essential for storing and charging LiPo batteries. They contain fires if there’s a malfunction. Good storage keeps batteries at a safe temperature and charge level.
Battery Monitors and Testers
Battery monitors and testers let you check your LiPo batteries’ condition and performance. They measure voltage, capacity, and internal resistance. This helps you know when to replace batteries.
Performance Comparison: Real-World Testing
We tested LiPo batteries in real-world scenarios. We looked at how long they lasted, how much power they delivered, and how durable they were. This gave us a full picture of their performance under different conditions.
Runtime and Power Delivery Tests
We ran runtime tests to see how long LiPo batteries could power RC devices. High-capacity batteries from Tattu and Gens Ace lasted longer than others. Power delivery tests showed how well batteries could handle peak current. Batteries with higher C-ratings performed better, making them great for demanding RC tasks.
- Tattu batteries lasted up to 30% longer than average.
- Gens Ace batteries kept their power steady, even under heavy loads.
- High C-rating batteries helped RC cars accelerate faster.

LiPo battery performance test results
Durability and Cycle Life
Durability tests involved many charge and discharge cycles. Batteries that were well-maintained and stored lasted longer. Our tests showed that brands like Turnigy and Zeee were reliable when used correctly.
- Storing batteries properly can extend their life.
- Regular balancing helps LiPo batteries last longer.
- Staying away from deep discharges keeps batteries healthy.
Value for Money Analysis
We looked at how much value different LiPo batteries offered. Premium brands like Tattu and Gens Ace were worth the extra cost because of their top performance and long life. Budget options like Zeee were good for casual users but didn’t match the quality of premium brands.
- Tattu and Gens Ace were the best value.
- Zeee batteries were okay for occasional use.
- Quality chargers and storage solutions can make batteries last longer.
Buying Guide: How to Select the Right LiPo Battery
Choosing the right LiPo battery can greatly improve your RC vehicle’s performance and life. You need to think about your vehicle’s needs, your budget, and where to buy quality batteries.
Matching Battery to Vehicle Requirements
To pick the right LiPo battery, know what your RC vehicle needs. Different vehicles need different power levels. For example, fast RC cars need batteries that can discharge quickly, while RC planes need batteries that balance capacity and weight.
Key Considerations:
- Vehicle type (car, truck, aircraft, boat)
- Required voltage and capacity
- Discharge rate (C-rating)
- Size and weight constraints
Budget Considerations and Value
When choosing a LiPo battery, your budget is important. It’s easy to be drawn to the cheapest option. But, spending more can mean better performance, longer life, and safety features.
| Brand | Price Range | Value Features |
| Turnigy | $20-$50 | High capacity, reliable |
| Tattu | $30-$70 | Premium quality, high discharge rate |
| Gens Ace | $25-$60 | Reliability, consistent performance |
Where to Buy Quality LiPo Batteries
It’s important to buy from trusted sources to get a genuine and safe LiPo battery. Online stores like HobbyKing, Amazon, and RC hobby shops have a wide selection from different brands.
When shopping online, look at seller ratings, reviews, and warranties. Buying from authorized dealers can also give you peace of mind about product authenticity and support.
Conclusion
Choosing the right RC LiPo battery is key for a better RC experience. This guide has helped you understand what to look for. It covers safety, performance, and how long the battery lasts.
Knowing about capacity, discharge rate, and cell count helps pick the right battery. Brands like Turnigy, Tattu, and Gens Ace have great options for all budgets.
Look at runtime, power, and how durable the battery is. Also, learn how to charge and store it right. This will make your battery last longer.
Now you’re ready to find the perfect LiPo battery. Check out our recommended batteries and accessories. The right battery makes RC fun and safe.
FAQ
What is the ideal capacity for an RC LiPo battery?
How do I choose the correct C-rating for my LiPo battery?
Can I use a LiPo battery charger with any LiPo battery?
How should I store my LiPo batteries when not in use?
What are the benefits of using a balance charger for LiPo batteries?
How do I know if my LiPo battery is damaged or swollen?
Can I mix different LiPo battery brands or models in the same RC device?
What is the average lifespan of a LiPo battery?
Are LiPo batteries allowed on airplanes?
7 Must-Have Tools Every RC Car Owner Needs
7 Must-Have Tools Every RC Car Owner Needs
Are you getting the most out of your RC hobby experience? The right tools are key for both newbies and pros. They help keep your RC in top shape and running smoothly.

For RC fans, the right tools are more than just handy. They boost your car’s speed, make it last longer, and look better. The right tools can make a big difference.
Key Takeaways
- Essential tools for RC car maintenance
- Customization options to enhance performance
- Tips for choosing the right tools for your RC car
- Importance of regular maintenance for longevity
- Tools that can improve your RC car’s speed and durability
Why Quality RC Car Tools Make All the Difference
Investing in quality RC car tools is key for keeping your car in top shape. It helps your car run smoothly and last longer. This is essential for any RC car enthusiast.
The Impact of Proper Maintenance on Performance
Using the right tools for regular maintenance boosts your RC car’s performance. It ensures your car goes faster, handles better, and feels more real. Quality tools help you make precise adjustments and repairs.
A precision hex driver set is great for tightening or loosening screws without damage. This keeps your car’s body and parts securely in place. It’s crucial for serious racing and enthusiasts.
Avoiding Costly Repairs with Regular Upkeep
Regular upkeep with quality tools can save you from expensive repairs. Catching small problems early stops them from becoming big, costly issues. It also makes your RC car last longer, which is a smart investment.
| Maintenance Task | Frequency | Benefit |
|---|---|---|
| Checking and tightening screws | After every use | Prevents loose parts from causing damage |
| Cleaning the motor and bearings | Every 5-10 runs | Improves performance and longevity |
| Inspecting for wear and tear | Every 10-20 runs | Early detection of potential issues |
By sticking to a regular maintenance routine and using quality tools, you’ll have a better RC car experience. You’ll also avoid expensive repairs and keep your car running at its best.
How to Build Your Essential RC Car Tools Collection
Building a good RC car tools collection is key for any hobbyist. It boosts performance and extends your RC car’s life. A well-stocked toolkit is essential.
Beginner vs Advanced Tool Requirements
Beginners need basic tools for simple maintenance and repairs. Must-haves include a precision hex driver set, multi-bit screwdriver, and needle-nose pliers. Advanced hobbyists might need a soldering station, digital multimeter, and special cleaning kits.
As you get more into the hobby, your toolset will grow. You’ll add more tools over time.
Investment Considerations for Long-Term Hobbyists
Long-term hobbyists should invest in quality tools. They might cost more upfront, but they last longer. This means you won’t need to replace them as often.
Think about how often you’ll use the tool, its quality, and if you can upgrade it. This way, you’ll have a toolkit that grows with your hobby.
Must-Have #1: Precision Hex Driver Set
A precision hex driver set is key for keeping or improving your RC car. It’s a must-have for any RC fan. It offers the precision and flexibility needed for many tasks.
Common Hex Sizes Used in Popular RC Car Brands
RC car brands need specific hex sizes. For example, Traxxas, Axial, and HPI Racing use 1.5mm, 2.0mm, and 2.5mm hex drivers. Having these sizes ensures you’re ready for most jobs.
- 1.5mm: Used for small screws in electronics and suspension parts.
- 2.0mm: Versatile for many RC car brands, for small and big repairs.
- 2.5mm: For big screws, like those in chassis and major parts.
Ball-End vs Standard Hex Drivers
The hex driver tip’s design matters a lot. Ball-end hex drivers are flexible, great for tight spaces. Standard hex drivers fit better, less chance of screw damage.
Metal vs Composite Handles for Comfort and Durability
The handle’s material impacts comfort and durability. Metal handles are strong but can be hard to hold for long. Composite handles are softer, easier to hold, and less tiring.
In summary, a precision hex driver set is essential for RC car fans. Knowing about hex sizes, driver types, and handle materials helps choose the right tools.
Must-Have #2: Multi-Bit Screwdriver Kit
A multi-bit screwdriver kit is a must-have for RC car fans. It’s versatile and makes tasks easy. You can use it for simple upkeep or big repairs.
Phillips, Flathead, and Specialty Bits for RC Cars
RC cars need different screwdriver bits. You’ll need Phillips, flathead, and specialty bits. A good kit should have all these for various tasks.
Phillips bits fit screws with a cross-shaped slot. Flathead bits are for screws with a single slot. Specialty bits, like Torx or hex, are for specific models or parts.
Using the right bit prevents damage. It keeps screws from getting stripped or parts from getting hurt.
Magnetic Tips for Hard-to-Reach Screws
Magnetic tips are a key feature in a good screwdriver kit. They’re great for screws in tight spots. Magnetic tips keep screws from falling off or getting lost.
Torque Control Features Worth the Investment
Look for torque control in a screwdriver kit. It lets you adjust how much force you apply. This is good for avoiding damage to parts or screws.
Getting a top-notch screwdriver kit with torque control is worth it. It helps you do delicate tasks with precision. This keeps your RC car in top shape.
Must-Have #3: Needle-Nose Pliers and Wire Cutters
Needle-nose pliers and wire cutters are key for fine-tuning and fixing RC cars. They are made for making small adjustments and repairs. These tasks are common in keeping RC cars in top shape.
Essential Applications in Linkage Adjustments
Needle-nose pliers are great for adjusting linkages. These adjustments are vital for RC cars to run well. Their thin tips let you get into small spaces easily.
This precision is crucial. It ensures linkages are set right. This affects how the car handles and performs.
Wire Management and Electrical Repairs
Wire cutters are key for electrical work. They help trim wires, strip insulation, and make clean cuts. These steps are important for a reliable electrical system.
Using wire cutters also prevents damage to other parts. This keeps the electrical system working well.
Quality Indicators in RC-Specific Pliers
When picking pliers and cutters for RC cars, look for quality. Durability, precision, and ergonomic design are important. Good pliers have sharp tips and are made to last.
Also, look for ergonomic handles. They make using the tools for a long time more comfortable. This makes maintenance easier and more efficient.
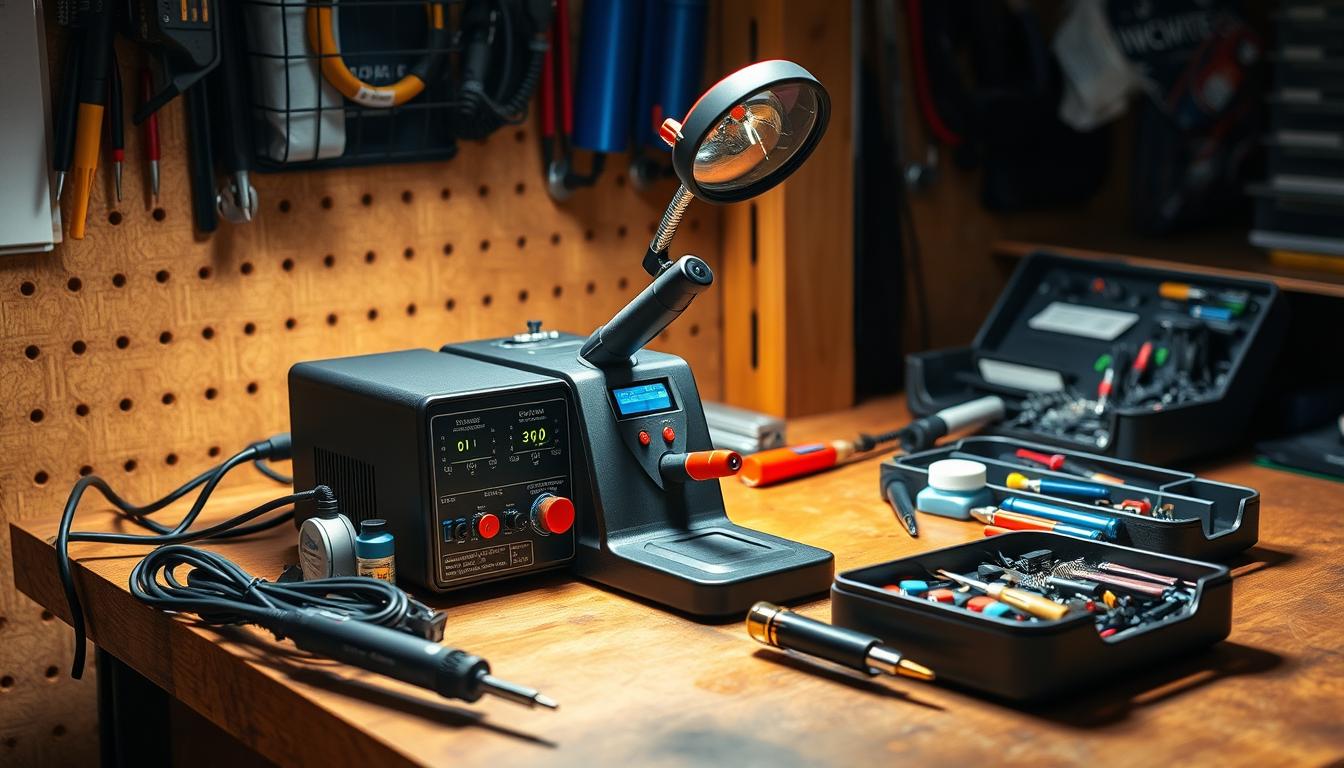
Must-Have #4: Soldering Station for Electrical Connections
A soldering station is a must-have for RC car fans who want to upgrade or fix their car’s electrical parts. It gives you the precision and control needed for making strong electrical connections. These connections are key for your car to run at its best.
Temperature Control for Different RC Components
Temperature control is a key feature of a good soldering station. Different RC parts need different soldering temperatures. For example, surface mount parts need lower temperatures to avoid damage. On the other hand, bigger parts like connectors or wires need higher temperatures for a solid bond.
According to
“Soldering is a precise process that requires the right temperature to achieve a strong and reliable bond.” –
| Component | Recommended Temperature |
|---|---|
| Surface Mount | 250°C – 300°C |
| Connectors/Wires | 350°C – 400°C |
Essential Soldering Accessories for RC Work
To get the most out of your soldering station, you’ll need some essential accessories. These include different soldering tips, flux, and solder. The right tip can greatly improve the quality of your solder joints.
- Soldering Tips: Various sizes and shapes for different components
- Flux: Helps in achieving clean solder joints by removing oxidation
- Solder: Choose the right alloy and diameter for your needs
Step-by-Step Guide to Clean Solder Joints
Clean solder joints are crucial for reliable electrical connections. Here’s a simple step-by-step guide:
- Prepare your components and soldering station.
- Apply a small amount of flux to the joint.
- Heat the joint with your soldering iron.
- Apply solder to the joint, not the iron.
- Inspect the joint for quality and cleanliness.
By following these steps and using the right tools, you can make professional-quality solder joints. These joints will improve your RC car’s performance and reliability.
Must-Have #5: Digital Multimeter for Diagnostics
A digital multimeter is a must-have for any serious RC car owner. It lets you check voltage, current, and resistance. This makes it key for keeping your RC car’s electrical system in top shape.
Testing Motor Performance and Efficiency
A digital multimeter is great for checking your RC car’s motor. It helps you see if the motor is working right. For example, if the voltage drops when the motor works hard, it might mean the battery is weak or there’s too much resistance.
To test motor performance:
- Connect the multimeter in series with the motor to measure current.
- Measure the voltage across the motor terminals.
- Compare your readings against the motor’s specifications to identify any deviations.
Battery Health Monitoring Techniques
Keeping an eye on your RC car’s battery is key. A digital multimeter lets you check the battery’s voltage. This helps you know when it’s time to replace the battery, avoiding sudden failures.
To monitor battery health:
- Measure the battery voltage at rest and under load.
- Compare the measured voltage against the battery’s rated voltage.
- Check for voltage sag during high-current draws.
Troubleshooting Electrical Gremlins in RC Systems
Without the right tools, finding electrical problems can be tough. A digital multimeter is essential for fixing issues like bad wiring or loose connections. It helps you find and fix electrical problems in your RC car’s system.
For effective troubleshooting:
- Use the continuity test function to check for shorts or opens in wiring and connections.
- Measure voltage drops across components to identify excessive resistance.
- Monitor current consumption to detect components drawing excessive current.
Adding a digital multimeter to your toolkit helps you fix electrical issues. This ensures your RC car runs smoothly.
Must-Have #6: RC Car Body Reamer and Hole Punch Set
The sixth must-have tool for any serious RC car owner is the RC car body reamer and hole punch set. It’s designed for precision modifications. This toolset is crucial for anyone looking to customize their RC car’s body, ensuring a perfect fit and finish.
Creating Clean Body Mounts and Wheel Wells
A body reamer is essential for enlarging mounting holes and creating clean wheel wells. It allows for precise adjustments, ensuring that the body fits snugly over the chassis without any obstructions. This precision is key to maintaining the car’s aerodynamics and overall performance.
Customization Options with Precision Hole Tools
With a hole punch set, RC car enthusiasts can add custom details to their vehicles. Such as additional vents or mounting points for accessories. The precision offered by these tools enables intricate designs that can set a model apart from standard configurations.
- Create custom venting systems for improved cooling
- Add mounting points for additional accessories
- Enhance the visual appeal with precise detailing
Preventing Body Cracks and Tears
Using a body reamer and hole punch set can also help prevent damage to the RC car body. By making clean, precise holes, these tools reduce the risk of cracks and tears that can occur with improper drilling techniques. This not only extends the life of the body but also maintains its appearance.
In summary, an RC car body reamer and hole punch set is a vital tool for any RC car enthusiast looking to customize or maintain their vehicle. It offers the precision needed for a professional finish, enhances customization options, and helps prevent damage to the car’s body.
Must-Have #7: Specialized RC Car Cleaning Kit
A clean RC car is not just about looks; it’s about how well it works and lasts. That’s why a specialized RC car cleaning kit is a must-have. The right tools can make a big difference in your RC car’s performance and life span.

To clean your RC car right, you need the right tools and solutions. Let’s look at what a complete cleaning kit should have.
Compressed Air Systems for Dust Removal
Compressed air systems are key for any RC car cleaning kit. They help blow out dust and dirt from hard-to-reach places. This keeps your RC car clean and ensures dirt doesn’t mess with its moving parts.
Bearing and Motor Cleaning Solutions
Cleaning bearing and motor parts needs special solutions. These solutions must remove dirt without harming these delicate parts. A good kit should have these solutions to keep your RC car running smoothly.
Protective Coatings for Longevity
After cleaning, using protective coatings helps keep your RC car in great shape. These coatings protect against rust, reduce friction, and keep your RC car looking new. Adding these to your care routine can make your RC car last longer and perform better.
In short, a specialized RC car cleaning kit is vital for any RC car fan. With a kit that has compressed air systems, solutions for bearings and motors, and protective coatings, your RC car will stay in top shape. This means better performance and a longer life for your RC car.
Creating the Ultimate RC Car Tools Workstation
Whether you’re into RC cars casually or competitively, a dedicated workspace is key. An organized area boosts efficiency and makes your hobby more fun.
Portable Options for Racers and Bashers
Traveling racers and bashers need a portable tool kit. Look for a tough, small case that fits all your must-haves. DeWalt and Greenlee make great, portable storage.
- Compact tool cases for easy transport
- Quick-access compartments for frequently used tools
- Durable construction to withstand travel rigors
Workshop Organization for Serious Enthusiasts
For serious RC fans, a well-organized workshop is a must. It’s not just about storing tools. It’s about making your space efficient and easy to use. Think about a pegboard, labeled bins, and a workbench with a built-in vice.
| Organization Element | Benefits |
|---|---|
| Pegboard | Easy tool access, customizable layout |
| Labeled Storage Bins | Parts categorization, reduced clutter |
| Workbench with Vice | Stable work surface, enhanced precision |
As
“The devil is in the details,” a well-organized workstation can make all the difference in your RC car hobby experience.
By investing time in creating the ultimate RC car tools workstation, you’re not just organizing tools—you’re enhancing your hobby.
Seasonal Maintenance Schedule Using Your RC Car Tools
To keep your RC car in top shape, following a seasonal maintenance schedule is key. This makes sure your car is race-ready, no matter the weather.
Winter Preparation and Storage Considerations
When winter comes, getting your RC car ready for storage is vital. First, clean it well to avoid corrosion. Use a specialized RC car cleaning kit for a thorough clean.
Think about where you’ll store it. Choose a dry, cool spot, out of the sun. Also, take out the batteries and keep them in a cool, dry area.
Summer Racing Season Tune-Up Checklist
Before summer racing starts, do a detailed tune-up. Check the motor and ESC for wear or damage. Make sure all screws and bolts are tight. Replace any parts that are worn out.
| Task | Pre-Winter | Pre-Summer |
|---|---|---|
| Clean the RC Car | ✔ | ✔ |
| Check and Replace Batteries | ✔ | |
| Tune-Up Motor and ESC | ✔ | |
| Inspect and Replace Worn Parts | ✔ |
By sticking to this seasonal maintenance plan, your RC car will stay in great shape all year. Regular care boosts performance and extends your car’s life.
When to Upgrade Your RC Car Tools: Quality vs Budget Options
Deciding to upgrade RC car tools often comes down to quality and budget. As you get more into the hobby, you might find your first tools don’t cut it anymore.
Professional-Grade Tools Worth the Investment
Going for professional-grade RC tools can really boost your car’s performance and lifespan. These tools are built to last and give you accurate results. They’re a smart choice for those who are serious about their hobby.
Budget-Friendly Alternatives That Still Perform
If you’re watching your wallet, there are still affordable options that work well. They might not last as long as top-notch tools, but they’re a good starting point or backup.
Choosing to upgrade depends on your needs and how often you use your RC car. Weighing the pros of quality tools against the cost helps you make a choice that improves your RC car experience.
Conclusion: Maximizing Your RC Experience with the Right Tools
Having the right tools is key for a great RC car experience. A good set of RC car tools keeps your vehicle in top shape. It makes sure your car runs well and lasts longer.
The seven essential tools mentioned in this article are a great start for any RC car fan. They include precision hex drivers and special cleaning kits. These tools make it easy to keep, fix, and improve your RC car.
Using these tools in your maintenance routine boosts your car’s performance. It helps you solve problems and avoid expensive fixes. This makes your RC car hobby more fun and rewarding.
Whether you’re an expert or new to RC cars, the right tools are vital. By following the main points from this article, you’re on your way to a better RC experience. You’ll take your RC car to new heights.
FAQ
What are the essential tools every RC car owner needs?
RC car owners need a few key tools. These include a precision hex driver set and a multi-bit screwdriver kit. Needle-nose pliers and wire cutters, a soldering station, and a digital multimeter are also important. Don’t forget an RC car body reamer and hole punch set, and a specialized cleaning kit.
Why is a precision hex driver set important for RC cars?
A precision hex driver set is vital for RC cars. It helps tighten and loosen hex screws. These screws are common in brands like Traxxas, Associated, and HPI.
How do I choose the right multi-bit screwdriver kit for my RC car?
Choosing the right multi-bit screwdriver kit is important. Look for one with Phillips, flathead, and specialty bits. Make sure it has magnetic tips and torque control features.
What is the purpose of a digital multimeter in RC car maintenance?
A digital multimeter is key for RC car maintenance. It tests motor performance and checks battery health. It also helps troubleshoot electrical issues, catching problems early.
How can I prevent body damage when working with my RC car?
To avoid body damage, use a body reamer and hole punch set. They help create clean mounts and wells. Applying protective coatings can also help extend your car’s life.
What are the benefits of using a specialized RC car cleaning kit?
A specialized cleaning kit is essential for keeping your RC car in top shape. It includes tools and solutions for cleaning and protecting your car. This includes compressed air, cleaning solutions, and protective coatings.
How often should I perform seasonal maintenance on my RC car?
Seasonal maintenance is crucial. Do it at least twice a year. Once before winter and again before summer. This ensures your car runs well and lasts longer.
What are the signs that I need to upgrade my RC car tools?
Upgrading tools might be needed if your car breaks often or performs unevenly. If you want better performance and longevity, consider professional-grade tools.
Best RC Cars for Beginners (2025 Edition)
Best RC Cars for Beginners (2025 Edition)
Looking to get into RC cars but not sure where to start? This guide is for hobbyists, parents, or anyone wanting to try bashing, drifting, or racing. We’ll show you the top RC cars for beginners in 2025.
We’ve tested and compared many beginner-friendly models. These cars are easy to use, durable, and come from trusted brands. They also have upgrade potential as you get better.
🏁 Quick Picks: Best RC Cars for Beginners
| RC Car | Best For | Scale | Price | Link |
| Traxxas Rustler XL-5 | All-around performance | 1/10 | $$$ | Check on Amazon |
| Arrma Granite 4×4 MEGA | Durability & bashing | 1/10 | $$$ | Check on Amazon |
| Redcat Racing Volcano EPX | Budget pick | 1/10 | $$ | Check on Amazon |
| Tamiya Grasshopper | Classic kit-building | 1/10 | $$ | Check on Amain Hobbies |
Prices and availability may vary. As an affiliate, we may earn from qualifying purchases.
🔧 What Makes a Good Beginner RC Car?
- Ready-To-Run (RTR): Fully assembled out of the box.
- Durability: Can survive crashes and tumbles.
- Easy-to-find Parts: From wheels to body shells.
- Upgradable: Grows with you as your skills improve.
1. Traxxas Rustler XL-5 – Best All-Around RC Car
The Rustler XL-5 is a top choice in the RC world. It’s fast (over 35mph out of the box), durable, and easy to maintain. It’s perfect for backyards, skate parks, or light off-roading.
Pros:
- Waterproof electronics
- Strong aftermarket support
- Easy battery access
Cons:
- Brushed motor may need upgrading down the line
2. Arrma Granite 4×4 MEGA – Best for Bashing
Arrma’s Granite is built to take a beating. It’s a perfect entry-level monster truck. It has a rugged design, modular chassis, and great value for the price.
Pros:
- Oil-filled shocks
- 2S LiPo compatible out of the box
- Excellent parts availability
Cons:
- Stock servo is a bit slow
3. Redcat Racing Volcano EPX – Budget-Friendly Fun
For under $200, this 1/10 scale truck is a great deal. It’s not as refined as Traxxas or Arrma, but it’s a solid starter.
Pros:
- Affordable
- Decent off-road handling
- RTR with battery/charger included
Cons:
- Plasticky construction
4. Tamiya Grasshopper – Best for Builders
If you enjoy DIY projects, the Grasshopper is a legendary RC kit. It’s fun to assemble and race. It’s not the fastest, but it teaches you the mechanics.
Pros:
- Great intro to kits
- Classic retro style
Cons:
- Needs assembly and electronics
🎯 Final Thoughts
When picking your first RC car, choose one that fits your terrain, budget, and interest level. RTR models are great for instant fun, while kits give you hands-on experience.
As your skills progress, all of these models offer paths for upgrading. You can add faster motors, better shocks, and stronger servos. This makes them great long-term hobby investments.
📩 Bonus: Free RC Beginner Setup Checklist
Want to make sure you have everything you need to hit the ground running?
👉 Download our FREE RC Setup Checklist and get access to our top gear picks, tools, and maintenance tips.
Disclosure: As an affiliate, RCGuides.com may earn a commission from qualifying purchases at no extra cost to you. This helps support our testing and content creation.
LiPo Storage Bags: The Essential Safety Upgrade for RC Battery Management
LiPo Storage Bags: The Essential Safety Upgrade for RC Battery Management
Why Every RC Enthusiast Needs a LiPo Storage Bag
If you use LiPo batteries in your RC vehicles, safety should be your top priority. LiPo batteries, while powerful, are also volatile if not stored correctly. A LiPo storage bag is an essential accessory that protects your workspace, home, and vehicle from potential battery-related hazards such as fire, overheating, and swelling.
In this guide, we’ll cover why LiPo storage bags are necessary, their benefits, how they work, top product recommendations, and best practices for keeping your RC batteries safe.
What Are LiPo Storage Bags?
A LiPo storage bag (also known as a LiPo safety bag) is a fireproof and explosion-resistant pouch designed to store and charge LiPo batteries safely. These bags are made from flame-retardant fiberglass material, which helps contain fire, smoke, and heat in case of a battery failure.
LiPo storage bags are commonly used for:
- Charging LiPo batteries – Preventing damage in case of overcharging or thermal runaway.
- Transporting batteries safely – Reducing the risk of damage or short circuits.
- Long-term storage – Protecting batteries from moisture, dust, and accidental impact.
Why You Need a LiPo Storage Bag
Using a LiPo storage bag is one of the easiest and most effective ways to enhance RC battery safety. Here’s why they are essential:
1. Fire and Explosion Containment
- Prevents fires from spreading if a LiPo battery overheats or fails.
- Made from high-temperature-resistant fiberglass materials.
2. Safe Charging Solution
- Reduces the risk of thermal runaway and overcharging mishaps.
- Provides a secure environment while charging high-capacity LiPo packs.
3. Prevents Battery Damage During Storage
- Shields batteries from dust, moisture, and accidental punctures.
- Protects against electrical shorts and physical impact.
4. Travel and Transport Safety
- Many airlines require LiPo batteries to be stored in fireproof bags when traveling.
- Helps ensure compliance with battery transportation regulations.
Best LiPo Storage Bags for RC Vehicles
Choosing the right LiPo storage bag depends on the size of your batteries, fire resistance rating, and capacity. Here are some top-rated options:
1. Lipo Safe by Hellfire RC
✔ Heavy-duty fiberglass material for maximum protection.
✔ Secure Velcro closure and reinforced seams.
✔ Best for large-capacity LiPo batteries.
2. Hobbymate LiPo Battery Safe Bag
✔ Heat-resistant up to 1000°F for superior fire protection.
✔ Ideal for charging and storage.
✔ Great for multi-battery storage needs.
3. Flite Test LiPo Guard Bag
✔ Compact and lightweight design for travel.
✔ Built-in carry handle for convenience.
✔ Perfect for RC planes, drones, and cars.
4. ARRMA LiPo Safe Pouch
✔ Reinforced fireproof zippers for extra security.
✔ Multiple sizes available for different battery capacities.
✔ Excellent choice for bashing, crawling, and racing enthusiasts.
How to Use a LiPo Storage Bag Properly
To maximize safety and effectiveness, follow these best practices when using a LiPo storage bag:
Step 1: Choose the Right Bag Size
- Ensure the bag is large enough to fit your battery packs without squeezing.
- If you store multiple batteries, use separate compartments or multiple bags.
Step 2: Store Batteries with the Terminals Covered
- Prevent short circuits by using protective caps on exposed connectors.
- Avoid storing damaged or swollen batteries in the same bag.
Step 3: Use the Bag for Charging
- Always charge your LiPo batteries inside the bag.
- Keep the bag on a non-flammable surface (e.g., concrete, tile, or metal).
Step 4: Keep the Bag Closed During Use
- Secure the Velcro, zipper, or straps while charging or storing.
- Ensure there’s adequate ventilation to avoid excessive heat buildup.
Step 5: Store in a Safe Location
- Avoid hot areas, direct sunlight, or flammable surfaces.
- If possible, place the bag in a fireproof metal container for extra security.
Pro Tips for Safe LiPo Storage
✅ Never Store a Fully Charged LiPo Battery – Use a LiPo discharge tool to bring it to storage voltage (3.8V per cell).
✅ Inspect Batteries Regularly – Check for swelling, leaks, or punctures.
✅ Use Separate Bags for Different Voltage Levels – Prevent potential imbalanced cell interactions.
✅ Keep Away from Flammable Materials – Store in a safe, isolated location.
✅ Replace Worn-Out Bags – If you notice frayed edges, burns, or wear, replace the storage bag immediately.
Where to Buy the Best LiPo Storage Bags
Find top-rated LiPo storage bags at:
- Amain Hobbies – Premium fireproof bags for LiPo safety.
- Horizon Hobby – Wide selection of battery storage solutions.
- Amazon – Budget-friendly options with fast shipping.
Protect Your RC Batteries with a LiPo Storage Bag
A LiPo storage bag is a simple yet crucial investment that can prevent costly damage, battery fires, and dangerous accidents. Whether you’re a weekend basher, drone pilot, or competitive racer, proper LiPo storage ensures safety, longevity, and peace of mind.
💬 Join the Conversation!
Do you use a LiPo storage bag? Share your experience and best practices in the comments below!
🔋 Ready to upgrade your battery safety? Browse the best LiPo storage bags at Amain Hobbies, Horizon Hobby, or Amazon and keep your RC gear secure!
LiPo Discharge Tools: The Essential Gear for RC Battery Maintenance
Why Every RC Enthusiast Needs a LiPo Discharge Tool
If you use LiPo batteries in your RC vehicles, you know how critical proper maintenance is for battery longevity, safety, and performance. One of the most overlooked aspects of LiPo care is discharging—a crucial step to prevent cell damage, ensure safe storage, and maximize battery life.
This is where LiPo discharge tools come in. These devices help you safely discharge LiPo batteries to appropriate levels, preventing issues like overheating, swelling, and voltage imbalances. In this guide, we’ll explore how LiPo discharge tools work, their benefits, top product recommendations, and best practices to keep your RC batteries in peak condition.
What Are LiPo Discharge Tools?
A LiPo discharge tool is a device designed to safely and efficiently reduce a LiPo battery’s voltage. This is essential for:
- Storage Discharging – Bringing the battery to an ideal storage voltage when not in use.
- Full Discharge for Disposal – Safely draining a damaged or unusable battery before disposal.
- Performance Tuning – Ensuring consistent voltage levels for optimal RC performance.
Most LiPo discharge tools come in the form of resistor-based dischargers, electronic discharge stations, or integrated balance chargers.
Why You Need a LiPo Discharge Tool
Using a LiPo discharge tool can significantly improve battery safety and performance. Here’s why they’re a must-have:
1. Prevents Battery Damage
- Avoids over-voltage and under-voltage issues that lead to premature battery failure.
- Reduces cell imbalance, ensuring longer battery life.
2. Enhances Safety
- Prevents thermal runaway—a major cause of LiPo fires.
- Ensures safe storage levels to reduce the risk of swelling and leakage.
3. Extends Battery Life
- Regular discharge cycles keep battery cells healthy.
- Reduces stress on LiPo packs during long storage periods.
4. Necessary for Proper Disposal
- Fully discharging dead or damaged LiPo batteries before disposal prevents potential fire hazards.
Best LiPo Discharge Tools for RC Vehicles
Choosing the right LiPo discharge tool depends on battery size, discharge speed, and voltage compatibility. Here are some top-rated options:
1. ISDT FD-200 Smart Discharger
✔ High-powered 200W discharge capability
✔ Digital interface for precise voltage control
✔ Ideal for serious RC enthusiasts and racers
2. Hobbymate 150W Battery Discharger
✔ Dual-function as a discharger and balancer
✔ Supports LiPo, LiFe, and Li-ion batteries
✔ Great for hobbyists needing efficient battery maintenance
3. SkyRC BD250 Battery Discharger
✔ Handles up to 35A discharge current
✔ Compact and easy-to-use LCD screen
✔ Best for high-capacity LiPo packs
4. Lipo Killer Resistor-Based Discharger
✔ Simple plug-and-play operation
✔ Affordable, passive discharge method
✔ Best for budget-conscious users who need safe disposal options
How to Use a LiPo Discharge Tool
To safely discharge your LiPo battery, follow these steps:
Step 1: Select the Right Discharge Tool
- Choose a tool that matches your battery type and discharge requirements.
- Ensure it can handle your battery’s voltage and capacity.
Step 2: Connect the Battery
- Plug the XT60, Deans, or other compatible connector into the discharger.
- If using a balance charger, connect the balance lead for monitoring.
Step 3: Set the Discharge Rate
- For storage, discharge the battery to 3.8V per cell.
- For disposal, discharge completely to 0V (with safety precautions).
Step 4: Monitor the Process
- Use a battery monitor or voltage checker to track progress.
- Never leave the battery unattended while discharging.
Step 5: Disconnect and Store
- Once at storage voltage, store in a fireproof LiPo bag.
- For disposal, place in saltwater for 24 hours before discarding safely.
Best Practices for Safe LiPo Discharging
✅ Discharge in a Fire-Safe Area – Use non-flammable surfaces like concrete or metal.
✅ Avoid Over-Discharging – Never drain below 3.0V per cell (unless disposing).
✅ Use a LiPo Safe Bag – Reduces risk of fire during discharge.
✅ Check Battery Temperature – Stop immediately if the battery gets too hot.
✅ Never Puncture a Swollen Battery – Instead, use a disposal discharge method.
Where to Buy the Best LiPo Discharge Tools
Find top-rated LiPo discharge tools at:
- Amain Hobbies – Offers professional-grade dischargers.
- Horizon Hobby – Great selection of smart discharge tools.
- Amazon – Budget-friendly and premium dischargers available.
Upgrade Your RC Setup with a LiPo Discharge Tool
If you’re serious about RC performance and battery longevity, a LiPo discharge tool is a must-have accessory. Properly managing your LiPo batteries prevents damage, enhances safety, and extends their lifespan—allowing you to get more out of every charge.
💬 Join the Conversation!
What LiPo discharge tool do you use? Drop a comment below and share your experience with the RC community!
🔋 Ready to upgrade your RC battery care? Browse top-rated LiPo discharge tools at Amain Hobbies, Horizon Hobby, or Amazon and keep your batteries performing at their best!
Solar Charging Kits: The Ultimate Power Upgrade for RC Enthusiasts
Solar Charging Kits: The Ultimate Power Upgrade for RC Enthusiasts
Why Solar Charging Kits Are a Game-Changer for RC Vehicles
RC vehicles rely on consistent power sources, but traditional charging methods can be limiting—especially when you’re outdoors. Enter solar charging kits, a cutting-edge solution that allows RC hobbyists to keep their batteries charged anywhere, without the need for electrical outlets. Whether you’re an off-road basher, a drone pilot, or a casual hobbyist, integrating solar charging into your setup can enhance convenience, extend playtime, and reduce environmental impact.
In this guide, we’ll explore how solar charging kits work, their benefits, key features to look for, and recommendations for the best options available.
What Are Solar Charging Kits?
A solar charging kit is a system that uses solar panels to convert sunlight into electricity, which is then used to charge RC batteries. These kits typically include:
- Solar Panels – Collect sunlight and convert it into usable energy.
- Charge Controllers – Regulate voltage and prevent overcharging.
- Battery Packs or Power Banks – Store excess energy for later use.
- Adapter Cables & Connectors – Ensure compatibility with different RC battery types.
Unlike traditional wall chargers, solar charging kits offer a portable, renewable, and off-grid charging solution, perfect for long outdoor RC sessions.
Benefits of Solar Charging Kits for RC Vehicles
1. Unlimited Power Anywhere
- No need for electrical outlets—perfect for remote locations, camping, and field racing.
- Reduces dependency on traditional charging stations.
2. Eco-Friendly and Cost-Effective
- Uses renewable energy, reducing carbon footprint.
- Saves money on electricity bills in the long run.
3. Extends RC Playtime
- Charge batteries on-the-go without waiting to get home.
- Keep backup batteries topped up while using your RC vehicle.
4. Compatible with Multiple Devices
- Can charge not only RC batteries but also controllers, drones, FPV cameras, and other accessories.
5. Reduces Battery Wear & Increases Lifespan
- Many solar chargers include smart charge controllers that prevent overheating, overcharging, and battery degradation.
Best Solar Charging Kits for RC Vehicles
Choosing the right solar charging kit depends on your battery type, capacity, and power needs. Here are some of the top-rated options available:
1. Renogy 10W Portable Solar Charging Kit
✔ Compact and lightweight, ideal for RC car batteries.
✔ Includes a built-in charge controller to prevent overcharging.
✔ Best for small-scale RC charging needs.
2. ALLPOWERS 18V 21W Solar Charger
✔ High-efficiency solar panel for faster charging.
✔ Dual USB ports for charging RC batteries and accessories simultaneously.
✔ Ideal for drone pilots and FPV enthusiasts.
3. Eco-Worthy 50W Solar Panel Kit
✔ Provides higher wattage output for larger RC battery packs.
✔ Includes a solar charge controller to manage multiple battery types.
✔ Best for long outdoor sessions and off-grid RC adventures.
4. Goal Zero Nomad 20
✔ Durable and weather-resistant for rugged RC use.
✔ Can be combined with power banks for energy storage.
✔ Perfect for camping and extended outdoor RC play.
How to Set Up and Use a Solar Charging Kit for Your RC Vehicle
Using a solar charging kit is relatively straightforward, but proper setup ensures efficient charging. Follow these steps for the best performance:
Step 1: Choose the Right Solar Panel Size
- Match the wattage and voltage to your RC battery’s requirements.
- Higher wattage panels charge batteries faster.
Step 2: Connect the Charge Controller
- Prevents overcharging and overheating of LiPo, NiMH, or LiFe batteries.
- Ensures a steady power output.
Step 3: Plug in Your RC Battery
- Use the appropriate adapter or connector for your specific RC battery type.
- Many kits include multiple charging options for different devices.
Step 4: Optimize Sunlight Exposure
- Place the solar panel in direct sunlight for maximum efficiency.
- Adjust the angle and position throughout the day for optimal energy capture.
Step 5: Monitor the Charging Process
- Use the charge controller’s display to track voltage and charge levels.
- Disconnect once the battery reaches full charge.
Pro Tips for Maximizing Solar Charging Efficiency
✅ Use a Battery Storage Pack: Store excess energy for nighttime or low-light conditions.
✅ Choose Foldable or Portable Panels: Makes transportation and setup easier.
✅ Opt for Waterproof Designs: Ensures durability for outdoor RC sessions.
✅ Use a Power Meter: Helps monitor charge levels to prevent overloading.
Where to Buy the Best Solar Charging Kits for RC Vehicles
Looking for a reliable solar charging kit? Check out these trusted retailers:
- Amain Hobbies – Wide selection of solar chargers for RC vehicles.
- Horizon Hobby – High-quality solar charging accessories.
- Amazon – Great deals on portable solar chargers for RC applications.
Upgrade Your RC Experience with Solar Charging Kits
Tired of running out of power mid-session? A solar charging kit ensures you stay charged and ready to go—anywhere, anytime! Whether you’re an off-road adventurer, drone racer, or FPV pilot, a portable solar charger extends your playtime and enhances convenience.
💬 Join the Conversation!
Have you used a solar charging kit for your RC setup? Share your experience in the comments below!
🔋 Get Your Solar Charging Kit Today! Browse top-rated options from Amain Hobbies, Horizon Hobby, or Amazon and keep your RC gear powered up—wherever your adventures take you!
Smart Battery Chargers: The Must-Have Performance Upgrade for RC Enthusiasts
Smart Battery Chargers: The Must-Have Performance Upgrade for RC Enthusiasts
Why Every RC Hobbyist Needs a Smart Battery Charger
RC vehicles demand high-performance power solutions, and a smart battery charger is one of the best upgrades you can invest in. Whether you’re into racing, bashing, or crawling, a smart charger enhances battery longevity, efficiency, and safety. This guide explores how smart battery chargers work, their benefits, and the best options available for RC enthusiasts.
What Is a Smart Battery Charger?
A smart battery charger automatically detects your battery type and optimizes the charging process for maximum performance and lifespan. Unlike basic chargers, smart chargers prevent overcharging, overheating, and inefficient energy use, making them essential for serious RC users.
Key Features:
- Auto-Detection – Recognizes battery type and sets ideal voltage and current.
- Fast & Safe Charging – Ensures quick charge times while preventing damage.
- Multiple Charging Modes – Includes balance charging, trickle charging, and storage settings for LiPo, NiMH, and other batteries.
Benefits of Smart Battery Chargers
- Extends Battery Life by preventing overheating and overcharging.
- Boosts Charging Efficiency by optimizing charge rates and reducing energy waste.
- Enhances Safety with automatic shutoff, short-circuit protection, and temperature monitoring.
Best Smart Battery Chargers for RC Vehicles
Choosing the right charger depends on your battery type, power needs, and desired features. Here are some top-rated options:
1. Traxxas EZ-Peak Live Charger
✔ Bluetooth-enabled with mobile app control
✔ Optimized for LiPo and NiMH batteries
✔ Ideal for Traxxas RC models and high-performance setups
2. ISDT Q6 Pro Smart Charger
✔ Compact, high-powered design
✔ Adjustable charging settings with a digital interface
✔ Best for multi-battery charging setups
3. HTRC C240 Duo Dual Smart Charger
✔ Dual charging ports for simultaneous battery charging
✔ Supports multiple battery chemistries, including LiPo, NiMH, and LiFe
✔ Great for RC racers and hobbyists managing multiple packs
How to Use a Smart Battery Charger
Charging Steps:
- Connect to a power source and ensure the charger is set to the correct voltage.
- Attach your LiPo or NiMH battery using the appropriate connector.
- Select the correct charging mode (fast charge, balance charge, or storage mode).
- Monitor the charge cycle via the digital display for optimal performance.
- Disconnect and store the battery properly after a full charge to maintain longevity.
Maintenance Tips for Smart Chargers
- Inspect cables and connectors regularly for wear and tear.
- Keep the charger clean and dust-free to prevent malfunctions.
- Use in a cool, dry environment to prevent overheating.
Where to Buy the Best Smart Battery Chargers
Looking for the best smart battery chargers? Shop at:
- Amain Hobbies – Trusted source for high-performance RC gear.
- Horizon Hobby – Offers a wide selection of RC batteries and chargers.
- Amazon – Find competitive prices and fast shipping.
Upgrade Your RC Setup with a Smart Battery Charger
A smart battery charger is an essential investment for any RC enthusiast. It ensures faster, safer, and more efficient charging, helping you get the most out of your RC vehicle. Whether you’re a racer, basher, or weekend hobbyist, upgrading to a smart charger will enhance your experience and extend the life of your batteries.
💬 Join the Conversation!
What smart battery charger do you use? Drop a comment below and share your experience with the RC community!
Voltage Regulators: Power Stability for Peak RC Performance
Voltage Regulators: Power Stability for Peak RC Performance
Why Voltage Regulators Are Essential for RC Vehicles
When it comes to pushing your RC vehicle to its limits, maintaining stable power is just as important as speed, handling, and durability. Voltage regulators play a crucial role in ensuring that your electronics receive a steady, reliable power supply, preventing surges, drops, or inconsistencies that could lead to performance issues or even damage. Whether you’re upgrading to high-powered servos, running multiple accessories, or simply looking to protect your system from voltage fluctuations, a high-quality voltage regulator is a must-have. In this guide, we’ll cover what voltage regulators do, their benefits, key features to look for, installation and maintenance tips, and the best options available for your RC setup.
What Are Voltage Regulators?
A voltage regulator is an electronic component that maintains a stable voltage level, ensuring that sensitive RC components—like servos, receivers, and electronic speed controllers (ESCs)—receive the correct and consistent voltage. Without a voltage regulator, fluctuations in power can lead to erratic performance, overheating, or even component failure.
Key Functions:
- Voltage Stabilization: Keeps power delivery consistent, preventing spikes and drops.
- Component Protection: Prevents damage to servos, ESCs, and receivers caused by power surges.
- Efficiency Optimization: Helps distribute power efficiently, preventing overheating and improving battery life.
Benefits of Voltage Regulators for RC Vehicles
Upgrading your RC setup with a voltage regulator provides a range of benefits, especially for high-performance and modified vehicles:
1. Improved Electronic Stability
- Prevents Voltage Spikes: Avoid unexpected component failures due to power surges.
- Eliminates Power Drops: Ensures servos and receivers function smoothly without performance fluctuations.
2. Protection for Expensive Components
- Extends Component Life: Helps prevent overheating or burnout of sensitive electronics.
- Prevents Glitching and Failures: Ensures stable signals for precise control, reducing radio interference.
3. Increased Performance and Efficiency
- Consistent Power Supply: Keeps all components running at their intended power levels, leading to smoother operation.
- Improved Battery Management: Some regulators optimize battery use, preventing unnecessary drain.
4. Versatile Applications
- Works with Multiple Systems: Can regulate power for receivers, servos, fans, LED lights, FPV cameras, and more.
- Compatible with Different Power Sources: Can be used with LiPo, NiMH, and other battery types.
Key Features to Look for in a Voltage Regulator
When selecting a voltage regulator for your RC vehicle, consider these important factors to ensure optimal performance:
1. Adjustable vs. Fixed Output
- Adjustable Regulators: Allow you to set the output voltage depending on your specific needs.
- Fixed Regulators: Provide a constant voltage level (e.g., 5V, 6V, 7.4V) for simple plug-and-play use.
2. Voltage Range and Output Power
- Input Voltage Compatibility: Ensure the regulator supports the voltage range of your RC vehicle’s battery (e.g., 7.4V for a 2S LiPo, 11.1V for a 3S LiPo).
- Output Capacity: Check the amp rating to ensure it can handle your system’s power demands.
3. Type of Regulator
- Switching Regulators (BEC – Battery Eliminator Circuit): More efficient and generate less heat, ideal for high-power applications.
- Linear Regulators: Simpler but can generate heat; best for low-power applications.
4. Build Quality and Heat Dissipation
- High-Quality Components: Look for durable materials that ensure long-term stability.
- Heat Management: Regulators with built-in heat sinks or cooling features help prevent overheating.
5. Compatibility with RC Systems
- Servo & Receiver Compatibility: Ensure the regulator is suitable for your servos, receiver, and ESC.
- Plug-and-Play vs. Soldering Required: Some voltage regulators are easy to install with connectors, while others require soldering for custom setups.
Top Voltage Regulator Recommendations for RC Vehicles
Based on performance, durability, and user feedback, here are some of the best voltage regulators available:
1. Castle Creations BEC 2.0
- Features: Adjustable output from 4.75V to 12V, capable of handling high-power servos.
- Best For: High-performance RC cars, trucks, and boats needing stable voltage under heavy loads.
2. Hobbywing UBEC (Universal Battery Eliminator Circuit)
- Features: Switch-mode design with up to 8A continuous current, providing stable voltage without excessive heat.
- Best For: Off-road and racing RC vehicles requiring efficient power regulation.
3. Spektrum Voltage Regulator
- Features: Fixed 6V output, compact and lightweight, easy plug-and-play installation.
- Best For: RC airplanes, drones, and vehicles needing reliable voltage control.
4. ProTek RC Heavy-Duty Voltage Regulator
- Features: Designed for high-torque servos and receiver protection, available in multiple voltage outputs.
- Best For: Large-scale crawlers, high-speed bashers, and competition RC models.
How to Install a Voltage Regulator in Your RC Vehicle
Installing a voltage regulator can vary depending on your RC setup, but here’s a general step-by-step guide:
- Preparation:
- Power Off Your Vehicle: Disconnect the battery to ensure safety.
- Identify Connection Points: Locate the input (battery connection) and output (receiver, ESC, or servos) ports.
- Wiring the Regulator:
- Connect to Battery: Attach the regulator’s input wires to your battery or ESC power source.
- Attach to Receiver/Servos: Connect the output wires to the appropriate power input on your receiver or servos.
- Use a Soldering Iron (if necessary): If your regulator requires direct wire connections, solder the joints securely.
- Adjusting Voltage (if applicable):
- Set Desired Output: If using an adjustable regulator, use a voltage meter to set the correct output level.
- Double-Check Settings: Ensure the voltage matches the requirements of your servos, receiver, or accessories.
- Final Inspection and Testing:
- Secure Connections: Use heat shrink tubing or zip ties to organize wires.
- Power On Your System: Turn on your RC vehicle and check for proper function.
- Test Under Load: Run your vehicle to confirm the regulator is providing stable voltage.
Maintenance Tips for Voltage Regulators
To ensure long-lasting performance from your voltage regulator, follow these maintenance tips:
- Regularly Check Voltage Output: Use a multimeter to verify that your regulator is maintaining the correct voltage.
- Inspect for Overheating: If the regulator gets too hot, consider upgrading to a model with better heat dissipation.
- Secure Wiring: Avoid loose connections that could lead to inconsistent power delivery.
- Clean Periodically: Dust and dirt can affect connectors and performance, so keep the regulator clean.
Applications for Voltage Regulators in RC Vehicles
Voltage regulators are useful in a variety of RC applications:
- RC Cars and Trucks: Prevents voltage drops when using high-torque servos or multiple accessories.
- RC Crawlers: Ensures steady power delivery during high-demand crawling sessions.
- RC Boats: Protects sensitive electronics from power fluctuations in marine environments.
- RC Drones and Planes: Maintains stable voltage for FPV cameras, receivers, and flight controllers.
Upgrade Your RC Vehicle with a Voltage Regulator Today!
Don’t let voltage fluctuations ruin your RC experience. Voltage regulators provide stable power, protect valuable components, and optimize performance for all types of RC vehicles.
Find the best voltage regulator for your setup—shop now on Amain Hobbies, Horizon Hobby, or Amazon.
Have you upgraded your RC system with a voltage regulator? Share your setup, tips, and experiences in the comments below!
- Best Portable Power Stations for RC Cars (Run Your Setup Anywhere)
- Best RC FPV Camera Systems (Analog vs Digital + What You Should Actually Buy)
- Stop Stripping Your Screws: 6 Impactful Secrets to Mastering the RC Maintenance Game
- The Secret Life of LiPo Chargers: 5 Things Your Manual Might Not Be Telling You
- The RC Pilot’s Guide to Never Running Out of Juice: Power Station Comparison